Hey everyone, this is Brady from Texturelabs.org! Today, I’m diving into an exciting project—creating a grungy chrome text effect, inspired by my teapot. The unique part? I’ll be doing it in both Photoshop and After Effects, side by side, as completely separate projects. Whether you’re an After Effects user curious about Photoshop techniques or a Photoshop user interested in After Effects capabilities, this tutorial is for you. Let’s get started!
Setting Up in Photoshop
- Create a New Document: Open Photoshop and start with a 3840×2160 (4K resolution) canvas with a black background. Choose 16-bit for higher color precision.
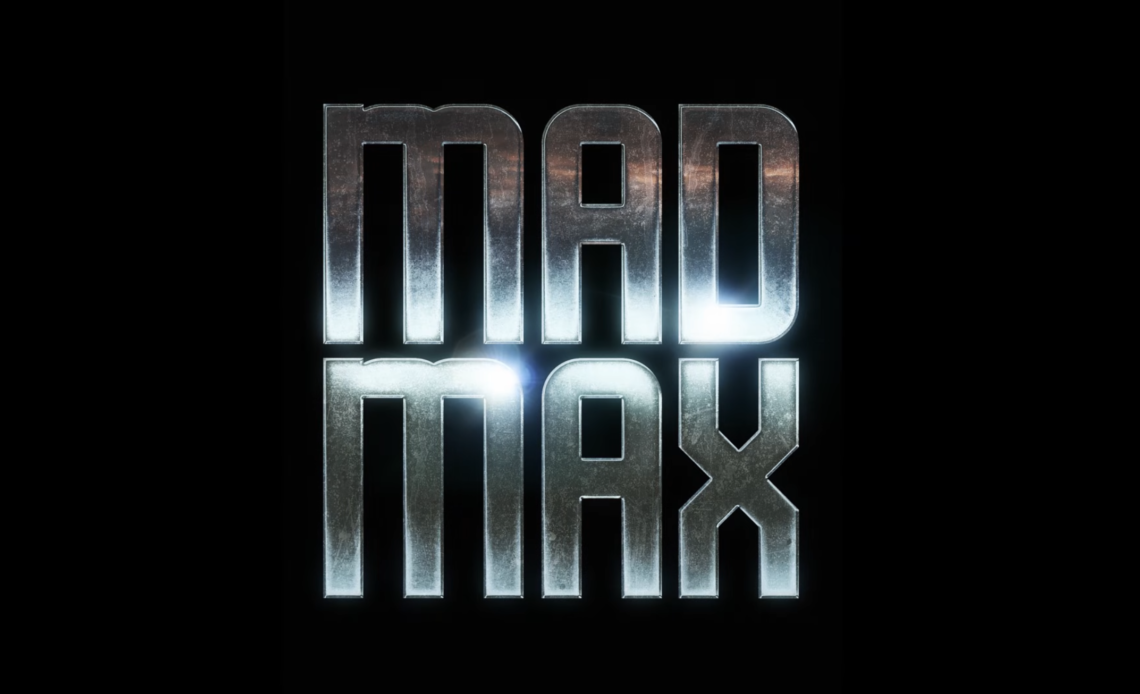
- Add Text: Use the Schluber font (fun fact: this was Mad Max’s name in the first draft of the script). Set the text color to 50% gray.
- Apply Bevel & Emboss:
- Go to Layer Styles > Bevel and Emboss.
- Set Depth: 200, Size: 10px, and Light Angle: 80 degrees.
- Add Inner Shadow:
- Set Distance: 0, Size: 35px, and Opacity: 50%.
- Group and Mask:
- Place the text layer into a group.
- Create a new layer for gradients and textures, ensuring it clips to the text.
Replicating the Setup in After Effects
- Create a New Composition:
- Set dimensions to 3840×2160, 23.976 FPS, and 16-bit depth.
- Add Text:
- Use the same Schluber font and 50% gray color.
- Apply Layer Styles:
- Navigate to Layer > Layer Styles > Bevel and Emboss.
- Adjust settings to match Photoshop values.
- Enable Inner Shadow with the same settings.
Key Difference: In After Effects, layer styles are less commonly used, as most effects are applied via the Effects menu.
Adding a Gradient Overlay
In Photoshop:
- Create a New Layer called Gradient.
- Select the Gradient Tool (G) and apply a black-to-white gradient.
- Clip it to the text layer and set the blending mode to Overlay at 60% opacity.
In After Effects:
- Create a New Solid Layer.
- Apply the Generate > Gradient Ramp effect.
- Adjust colors and direction to match the Photoshop version.
- Set blending mode to Overlay at 60% opacity.
Implementing a Clipping Mask Equivalent in After Effects
Photoshop uses clipping masks, while After Effects uses track mattes and stencil alpha blending:
- Create a new solid layer (Knockout Layer).
- Apply Set Matte Effect to take transparency from the text layer.
- Change the Blending Mode to Stencil Alpha.
Adding Texture for a Grungy Look
In Photoshop:
- Import a grunge texture.
- Clip it to the text layer.
- Set Blending Mode to Overlay at 10% opacity.
In After Effects:
- Import and scale the texture.
- Place it beneath the knockout layer.
- Set Blending Mode to Overlay at 10% opacity.
Creating the Chrome Reflection Effect
In Photoshop:
- Add a Gradient Map Adjustment Layer.
- Customize the gradient to reflect a chrome-like look.
- Use real-life chrome images for reference.
In After Effects:
- There is no Gradient Map effect, so we use LUTs (Color Lookup Tables).
- Export Gradient Map from Photoshop as a .CUBE LUT file.
- Apply LUT in After Effects using Apply Color LUT effect.
Creating a Sky Reflection
In Photoshop:
- Import a cloudy sky image.
- Clip it to the text layer.
- Use Blend If settings to integrate it naturally.
In After Effects:
- Photoshop’s Blend If doesn’t exist in After Effects.
- Workaround: Duplicate the Photoshop layer with Blend If applied, save as a PSD, and import it into After Effects.
- Set it under the Knockout Layer.
Enhancing the Effect with Additional Elements
In Photoshop:
- Add another texture with darker areas.
- Set blending mode to Overlay at 40% opacity.
- Add a Lens Flare texture, set to Screen mode.
In After Effects:
- Import and scale the dark texture.
- Set blending mode to Overlay at 40% opacity.
- Use a Lens Flare texture or Video Copilot’s Optical Flares plugin.
Conclusion
And that’s it! Whether you prefer Photoshop or After Effects, this workflow allows you to create realistic chrome text with grungy textures and reflections. The Gradient Map trick in Photoshop and the LUT method in After Effects are key takeaways, along with how track mattes and Blend If alternatives work.
Give this a try, and let me know how your grungy chrome text turns out!