Creating dynamic motion graphics in Adobe After Effects can significantly enhance the quality and interactivity of your animations. One powerful technique is proximity-based animation, where elements react automatically when another object moves close to them. This method can be used in UI animations, explainer videos, motion graphics, and interactive visual designs to create engaging effects.
In this step-by-step tutorial, we will explore how to implement automatic proximity reactions in After Effects. By the end of this guide, you’ll understand how to set up objects that respond to movement, apply expressions to automate interactions, and refine your animations with lighting, shadows, and styles.
Let’s dive in!
Step 1: Setting Up the Base Composition
Creating the Basic Elements
- Open After Effects and create a new composition (1920x1080px, 30fps).
- Add a Null Object (Layer > New > Null Object), rename it Controller.
- Create a second Null Object, which will act as the interactive trigger.
- Add an Array of Shape Elements:
- Use the Ellipse Tool (Q) to draw multiple circles.
- Position them across the canvas to form an interactive pattern.
These elements will react when the Controller moves close to them.
Adding Expression Controls
- Select the Controller Null Object and go to Effect > Expression Controls > Slider Control.
- Rename the first slider Max Distance.
- Add a second Slider Control, rename it Strength.
These sliders will allow us to control how elements respond to proximity.
Step 2: Applying Expressions for Proximity Reaction
Now, let’s create the reaction effect so that elements move when the Controller gets close.
Writing the Expression for Position
- Select one Shape Layer, open the Position Property (P).
- Alt + Click on the stopwatch to enable expressions.
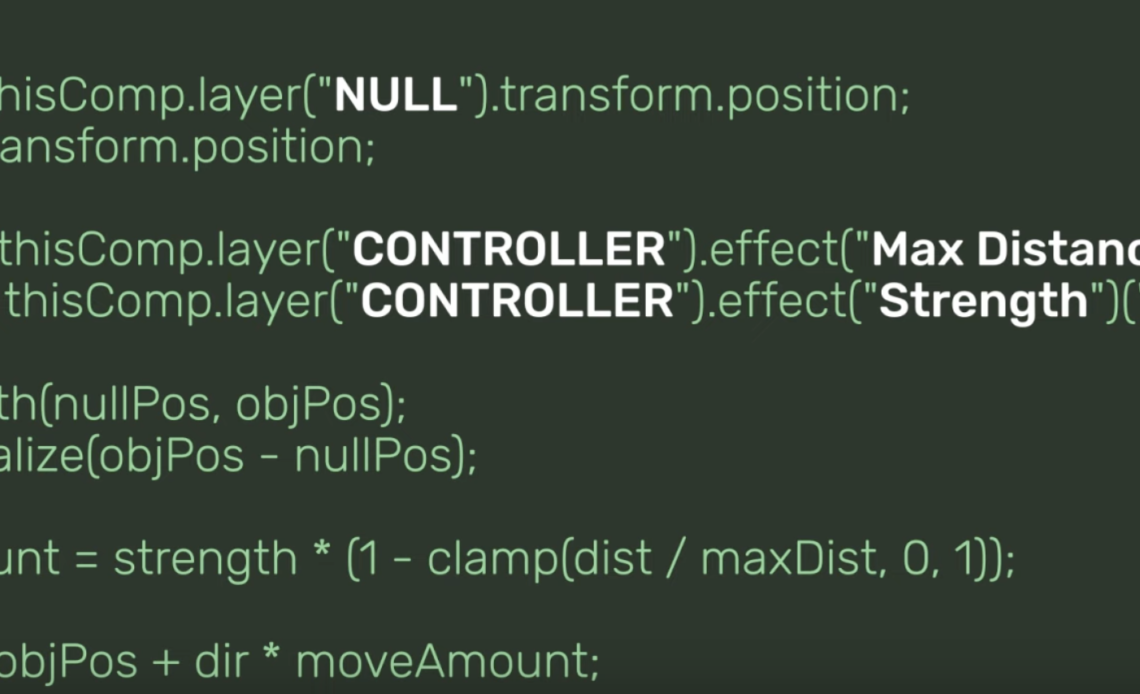
- Paste the following expression:
c = thisComp.layer("Controller");
maxDist = effect("Max Distance")("Slider");
strength = effect("Strength")("Slider");

p = c.position;
d = length(p, position);

if (d < maxDist) {
    direction = normalize(position - p);
    newPos = position + direction * (maxDist - d) * strength;
} else {
    newPos = position;
}

newPos;
Explanation:
- The script measures the distance between the element and the Controller.
- If the element is within Max Distance, it moves away.
- Strength determines how much the element moves.
- If a negative Strength is applied, the element moves toward the Controller.
Applying the Expression to All Elements
- Copy the expression and paste it into all other shape layers.
- Now, when moving the Controller, all elements react accordingly!
Step 3: Adding Variation to the Animation
To make the animation more interesting, we will modify reactions for different objects.
Creating Offset Reactions
- Duplicate the Strength Slider in the Controller.
- Rename it Strength L2.
- Select a secondary shape layer and modify its expression:
strength = effect("Strength L2")("Slider");Now, different objects can have unique movement strengths, making the animation more organic.
Animating Additional Elements
- Create a character face with simple stroke layers.
- Apply mask animation to simulate blinking.
- Use the same proximity effect to influence different parts of the face independently.
Step 4: Time-Based Proximity Animation
Adding time-based animations enhances the interaction. Here’s how:
Setting Up Time Remapping
- Select an animated layer (e.g., the face).
- Enable Time Remap (Right Click > Enable Time Remapping).
- Apply the following expression:
c = thisComp.layer("Controller");
d = length(c.position, position);
maxDist = effect("Max Distance")("Slider");

linear(d, 0, maxDist, time, 0);
How It Works:
- When the Controller moves closer, the animation plays forward.
- When it moves away, the animation plays in reverse.
Step 5: Refining the Animation with Eye Movements
To make the animation more lifelike, we’ll animate pupil movement reacting to the Controller.
Steps to Animate the Pupils
- Duplicate the Strength Slider, rename it Strength L3.
- Copy the position expression and change the strength reference to Strength L3.
- Adjust the slider to make the pupils react more subtly than the rest of the face.
Now, as the Controller moves, the pupils follow, making the animation more realistic!
Step 6: Adding Shadows and Lighting Effects
To enhance realism, we’ll add dynamic lighting effects.
Applying an Inner Shadow
- Go to Layer Style > Inner Shadow.
- Change the color to red (temporarily for visibility).
- Apply the following expression to the Angle property:
c = thisComp.layer("Controller");
p = c.position;
angle = radiansToDegrees(atan2(position[1] - p[1], position[0] - p[0]));
angle;
Explanation:
- The Inner Shadow rotates based on the Controller’s position.
- Adjust parameters like Distance and Choke for styling.
- Change the shadow color back to a natural shade.
Now, the shadow moves dynamically, improving depth and realism.
Step 7: Creating a Precomposed Lighting Effect
To add dynamic global lighting effects, follow these steps:
Setting Up Global Shadows
- Precompose all animated elements into a single layer.
- Create a new Null Object in the precomposition.
- Parent its position to the main Controller.
Adding Radial Blur for a Shadow Effect
- Duplicate the Precomp Layer.
- Apply a Fill Effect (black or dark gray).
- Apply a Fast Radial Blur Effect.
- Set the blur center to the Controller’s position.
Now, as the Controller moves, the global lighting updates dynamically!
Conclusion
By using proximity-based animations in After Effects, you can create highly interactive and visually engaging motion graphics. Here’s a recap of what we covered:
✔ Base Setup – Creating shape elements and expression controls. ✔ Proximity Reactions – Using expressions to move objects based on distance. ✔ Offset Variations – Adding multiple layers of strength for organic animation. ✔ Time-Based Reactions – Making animations play forward/reverse dynamically. ✔ Eye Movement Simulation – Creating realistic pupil tracking. ✔ Shadows & Lighting – Adding interactive depth to animations. ✔ Precomposed Lighting Effects – Controlling global illumination for realism.
This technique can be applied in many creative ways, from UI interactions to character animations and sci-fi visual effects. Experiment with different settings and expressions to push your animations even further!
If you found this guide helpful, be sure to experiment and integrate these techniques into your own motion graphics projects.