Adding blur effects to text in Adobe Photoshop is a creative way to create unique designs that grab attention. In this tutorial, we will explore how to apply Tilt-Shift Blur, Zoom Blur, and Box Blur to text, along with additional techniques to enhance the effects using Layer Styles and Filter Gallery Options.
By the end of this tutorial, you will learn how to:
- Use Tilt-Shift Blur to create a soft-focus effect.
- Apply Box Blur for a smooth, softened text look.
- Use Zoom Blur to generate a dynamic motion effect.
- Enhance text designs with gradient overlays, noise, and glow effects.
- Modify brightness, contrast, and color adjustments to refine the final result.
- Use masking techniques to selectively apply blur to specific parts of the text.
Whether you are a beginner or an experienced designer, these techniques will help you add depth and impact to your text-based designs.
Understanding Blur Effects in Photoshop
Before diving into the text effects, let’s understand the different types of blur filters in Photoshop:
1. Gaussian Blur
Gaussian Blur is the most commonly used blur effect. It applies a soft blur across the image, reducing sharpness and creating a smooth look.
2. Tilt-Shift Blur
Tilt-Shift Blur creates a gradual blur effect where certain areas remain sharp while others are blurred, mimicking a depth-of-field effect.
3. Box Blur
Box Blur applies a uniform blur effect by averaging pixel values, which is useful for creating smooth gradients and subtle blurs.
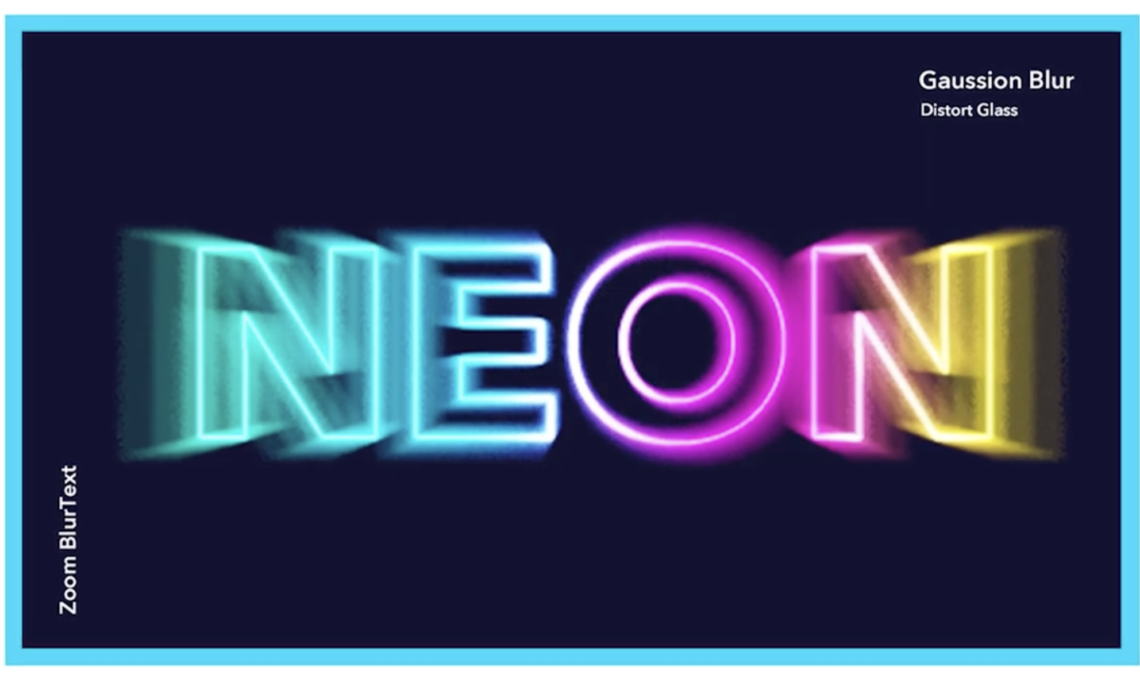
4. Zoom Blur (Radial Blur)
Zoom Blur creates a motion-like effect that makes it appear as if the text is moving outward from the center.
5. Glass Distortion Filter
This effect applies a frosted glass-like distortion to the text, giving it a unique texture and stylized look.
Now that we understand blur effects, let’s apply them to our text designs.
Design 1: Tilt-Shift Blur Effect on Text
Step 1: Setting Up the Photoshop Document
- Open Adobe Photoshop and create a new document (500×500 pixels, 72 DPI).
- Fill the background layer with black using Alt + Backspace.
- Select the Text Tool (T) and type a letter, such as “O”.
- Resize the text using Ctrl + T and position it at the center of the canvas.
Step 2: Converting Text into a Smart Object
- Right-click on the text layer and select Convert to Smart Object.
- This ensures that all applied filters remain non-destructive and editable.
Step 3: Applying Tilt-Shift Blur
- Go to Filter > Blur Gallery > Tilt-Shift.
- A blur pin appears at the center; move it to align with the text.
- Adjust the blur intensity by increasing the Blur Amount to 25px.
- Increase Distortion to 100% and check Symmetric Distortion.
- Adjust the focus area by dragging the solid and dashed lines.
- Click OK to apply the effect.
Step 4: Adding Noise for Texture
- Go to Filter > Noise > Add Noise.
- Set the noise amount to 10% and choose Uniform.
- Check Monochromatic to apply black-and-white noise.
- Click OK.
Step 5: Refining with Box Blur
- Go to Filter > Blur > Box Blur.
- Set the radius to 2px for a subtle smoothing effect.
- Ensure Box Blur is positioned beneath Tilt-Shift Blur in the Layers Panel.
- Click OK.
Step 6: Adding a Gradient Overlay
- Double-click on the text layer to open Layer Styles.
- Select Gradient Overlay and apply a black-to-gray gradient.
- Adjust the gradient angle for the best shading effect.
- Click OK.
Step 7: Adjusting Brightness and Contrast
- Go to Image > Adjustments > Brightness/Contrast.
- Increase Contrast slightly and lower Brightness to add depth.
- Apply Curves Adjustment Layer for a final brightness tweak.
Your Tilt-Shift Blur Text Effect is now complete!
Design 2: Glass-Like Blur Text Effect
Step 1: Creating a New Document
- Open a new Photoshop document (1500×1500 pixels, 72 DPI).
- Type a letter such as “V” and resize it to fit the canvas.
- Convert the text to Smart Object.
Step 2: Creating a Multi-Color Background
- Use the Pen Tool (P) to divide the background into five colored sections.
- Apply different shades of blue, red, and purple.
- Adjust the gradient and position for a smooth transition.
- Merge the colored shapes into one Smart Object.
Step 3: Applying Gaussian Blur
- Select the text layer.
- Go to Filter > Blur > Gaussian Blur.
- Set the blur radius to 43px to maintain text visibility while blurring.
- Click OK.
Step 4: Applying Glass Filter Effect
- Go to Filter > Filter Gallery > Distort > Glass.
- Adjust the Distortion to high for a crisp effect.
- Set Smoothness to low for more texture.
- Modify Scaling to balance sharpness and details.
- Click OK.
Step 5: Masking the Effect
- Add a Layer Mask to the text layer.
- Select the Brush Tool (B) with a soft black brush.
- Paint over areas where you want to reduce the effect.
- Adjust opacity to blend the effect smoothly.
Your Glass-Like Blur Text Effect is now ready!
Conclusion
In this tutorial, you learned how to create three different blur text effects in Photoshop:
- Tilt-Shift Blur Effect – Soft-focus effect with texture and depth.
- Glass-Like Blur Effect – A stylized text effect using Gaussian Blur and Glass Filter.
- Zoom Blur Motion Effect – A dynamic radial blur with glowing edges.
These techniques can be used in branding, social media graphics, and digital art. Experiment with different colors, effects, and blur levels to customize your designs.
If you found this tutorial helpful, like, share, and subscribe for more Photoshop design tips!