Adobe Photoshop is an incredibly powerful tool for designers, photographers, and digital artists. While many users are familiar with basic functions, there are several advanced techniques that can take your designs to the next level. In this tutorial, we will explore five advanced Photoshop tricks that you probably don’t know. These tricks will help you create realistic shadows, refine cutouts, generate realistic light effects, remove unwanted edges, and design stunning flame effects.
Each of these techniques is essential for anyone looking to enhance their digital artwork. By following the step-by-step instructions in this guide, you will learn how to refine your workflow and make your images look more professional.
1. Creating Advanced Realistic Shadows
Realistic shadows add depth and authenticity to images. Many designers struggle to create shadows that match the lighting and direction of the source. Fortunately, Photoshop provides several powerful tools to make this process easier.
Steps to Create Realistic Shadows:
- Duplicate the Image – Select the object and press
Ctrl + Jto duplicate the layer. - Make It Dark – Press
Ctrl + Mto bring up the Curves adjustment and darken the duplicated layer. - Apply Path Blur – Go to
Filter > Blur Gallery > Path Blurto set the direction of the shadow.- Adjust the blur direction to match the light source.
- Uncheck Centered Blur and increase the speed settings.
- Refine the Shadow –
- Apply Gaussian Blur (
Filter > Blur > Gaussian Blur) to soften the edges. - Decrease the opacity to make the shadow look more natural.
- Apply Gaussian Blur (
- Customize the Shadow Color –
- Add a solid color adjustment layer.
- Create a clipping mask to change the shadow color for added realism.
By carefully adjusting these settings, you can achieve soft, realistic shadows that enhance the depth of your image. This technique is particularly useful for e-commerce photography, digital art, and realistic photo composites.
Common Mistakes When Creating Shadows
- Ignoring the light source: Always match the shadow direction with the actual lighting.
- Over-blurring: Too much blur makes the shadow look unnatural.
- Using only black: Real shadows often have color tints depending on the environment.
Before & After
By following these steps, you can achieve professional-looking shadows that blend seamlessly with your image.
2. Creating a Professional Cutout with Perfect Edges
Cutting out objects from images is essential for photo manipulation, especially when working with subjects that have complex edges such as hair, fur, or intricate designs. However, automatic selection tools often leave unwanted white fringes. Here’s how to refine your cutouts like a pro.
Method 1: Clone Stamp Technique
- Make a Selection – Use the
Select Objecttool and create a mask. - Refine Edges – Go to
Mask Properties > Select and Maskand use the Refine Edge tool. - Remove White Fringes –
- Press
Ctrland click on the mask. - Go to
Select > Modify > Contract, set to 5 pixels, and invert the selection (Ctrl + Shift + I).
- Press
- Use Clone Stamp Tool –
- Create a new layer.
- Set it to a clipping mask.
- Use the Clone Stamp Tool (
S) to fill in the edges.
Method 2: Manual Hair Selection
- Manually Paint Over Edges –
- Use a hard-edged brush to mask out the image.
- Download a hair or grass brush and paint over the edges for a natural look.
This method provides an even more precise selection, which is particularly useful for high-end retouching and photo composites.
Why This Works Better Than Automatic Selection
Automatic selection tools often struggle with fine details like hair and fur. Using a combination of manual refinement and custom brushes allows for a more natural and high-quality cutout.
3. Creating Realistic God Rays Effect
Adding dramatic light rays (God Rays) to an image enhances depth and atmosphere. These are often used in fantasy art, cinematic compositions, and photography edits to create a sense of mystery and realism.
Steps:
- Select Highlights – Go to
Select > Color Range, choose Highlights, and adjust Fuzziness and Range. - Duplicate the Selection – Press
Ctrl + Jto create a new layer from the selection. - Convert to Smart Object – Right-click and choose
Convert to Smart Object. - Apply Radial Blur –
- Go to
Filter > Blur > Radial Blur. - Choose Zoom mode and set the quality to Best.
- Adjust the center position and blur amount.
- Go to
- Enhance the Color –
- Press
Ctrl + Mfor Curves Adjustment. - Increase reds, decrease blues, and adjust greens for a warm glow.
- Press
Additional Tips
- Use layer masks to selectively apply the effect.
- Adjust opacity to create a subtle glow.
- Experiment with different colors to create mood variations.
4. Removing Unwanted White Fringes from a Cutout
White edges often appear when selecting objects, especially when working with complex backgrounds. This simple technique helps remove them instantly.
Steps:
- Create a Mask – Select the background using
Select > Color Rangeand apply a mask. - Invert the Mask – Press
Ctrl + Ito swap the selection. - Apply Minimum Filter –
- Go to
Filter > Other > Minimum. - Adjust the Radius to push the mask’s edges inward.
- Set to Roundness for circular objects.
- Go to
Before & After
This method quickly removes unwanted edges, providing a cleaner, high-quality cutout.
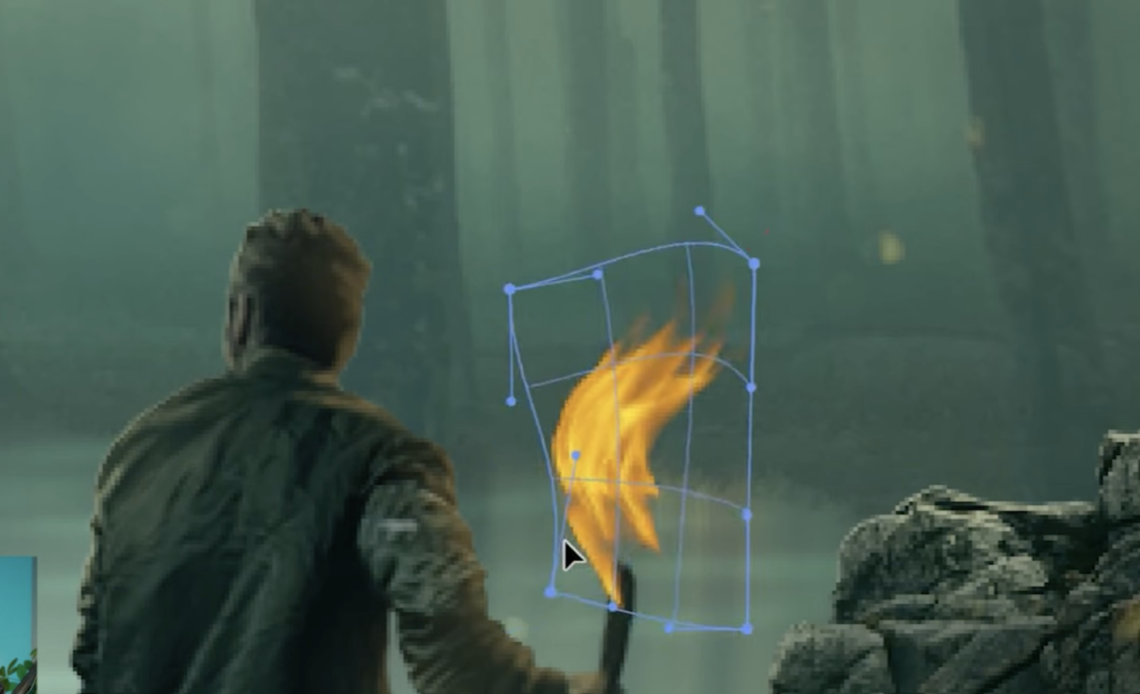
5. Creating Stunning Flame Effects
Fire effects are commonly used in digital art, advertisements, and fantasy compositions. Photoshop provides a built-in feature to create realistic flames with ease.
Steps:
- Draw the Shape – Use the Pen Tool (
P) to create a flame shape. - Render Flame –
- Go to
Filter > Render > Flame. - Select
One Flame Along Pathand adjust the width, opacity, and complexity.
- Go to
- Refine the Shape –
- Use
Ctrl + Tand apply Warp Transform to shape the flame.
- Use
- Enhance the Glow –
- Create a new layer and set its blending mode to Linear Dodge (Add).
- Use a soft brush to add a bright orange-red glow.
- Fine-Tune the Effect –
- Lower the opacity and use the Eraser Tool (
E) to refine edges.
- Lower the opacity and use the Eraser Tool (
By experimenting with different flame settings, you can create everything from small flickers to massive infernos.
Conclusion
By mastering these five advanced Photoshop techniques, you can significantly enhance your photo editing and digital art skills. These methods allow you to create more realistic and professional-looking compositions.
By practicing these techniques, you can take your Photoshop skills to the next level. Stay creative and experiment with these tricks to develop your own unique style!