Designing a YouTube End Screen in After Effects
In this tutorial, we’ll walk through creating a custom YouTube end screen using Adobe After Effects. Let’s dive into the steps needed to craft an engaging end screen for your videos.
Setting Up the Composition
- New Composition: Create a new composition named “End Screen” with a duration of 15 seconds.
- Background Creation: Start by adding a solid and applying a gradient ramp effect to set your preferred colors.
- Animating Background Elements: Use the ellipse tool to create dynamic shapes for movement. Adjust strokes, repeaters, and transform properties to achieve the desired animation effect.
- Background Opacity and Position: Decrease the opacity for a subtle effect and keyframe the position to move it smoothly across the screen.
Building Shapes and Text Elements
- Creating Rectangular Shapes: Utilize the rounded rectangle tool to craft shapes for your end screen. Animate their position and apply motion blur for a polished look.
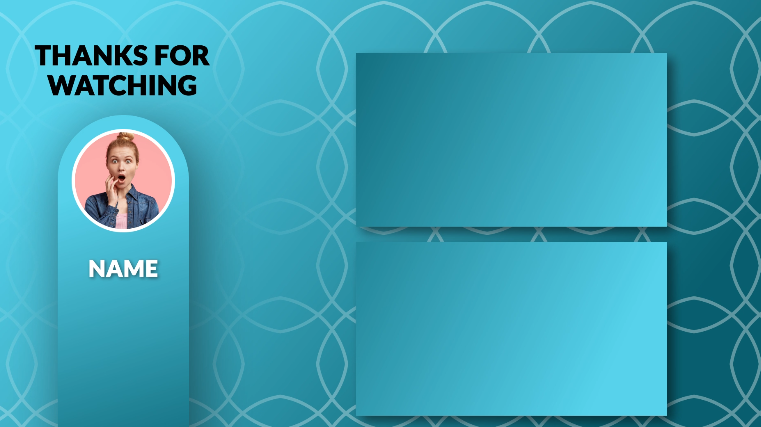
- Adding Text and Channel Name: Insert text elements such as “Thanks for Watching” and your channel name. Animate their appearance using position and opacity properties for a clean transition.
- Masking and Feathering: Use masks and feathering to refine the appearance of text elements, enhancing their visual appeal.
Incorporating Video and Image Placeholders
- Placeholder Creation: Develop placeholders for videos or images by layering shapes and adjusting track mattes for a professional finish.
- Customizing Image Display: Add images or video thumbnails to showcase how they’d fit into the placeholders. Scale and position them accordingly.
- Animating Image Movement: Keyframe the movement of the image or video placeholder to create an engaging visual transition.
Personalizing and Customizing
- Variations and Tweaks: Experiment with colors, shapes, and text variations. Tailor the end screen to your brand or video style by making necessary adjustments.
- Flexibility and Adaptability: Keep the design flexible, allowing for easy modifications in shapes, colors, and text for future videos.
Finalization and Conclusion
- Review and Optimization: Review the end screen design, ensuring it aligns with your brand and complements your video content.
- Subscribe and Share: If you found this tutorial helpful, consider subscribing for more content and share it with others interested in creating engaging YouTube end screens.
Crafting your custom YouTube end screen in After Effects allows for creativity and personalization. Experiment with various elements to create a design that stands out.
Thank you for following along with this tutorial. Start designing your end screens and make your YouTube videos more engaging and professional.