Introduction
Explosions in After Effects are naturally dynamic and visually stunning, making them an essential part of action-packed animations. In this tutorial, we’ll go through the process of creating a stylized explosion step by step. Additionally, we’ll introduce a secret technique that will make your explosions feel even more powerful!
By following this tutorial, you’ll learn how to: ✅ Create an explosion burst effect using shape layers. ✅ Use scaling and warping techniques to enhance the animation. ✅ Add impact frames for an extra cinematic punch. ✅ Integrate AE Juice assets (optional) for enhanced visuals.
Now, let’s jump into After Effects and start animating! 🚀🔥
Step 1: Setting Up Your Composition
- Open After Effects and create a New Composition.
- Set the resolution to 1920×1080, 30 FPS, and 5 seconds duration.
- Create a Background Layer:
- Go to
Layer > New > Solid. - Name it BG Layer, set the color to black, and place it at the bottom.
- Go to
Step 2: Creating the Explosion Burst
1. Creating the First Circle Burst
- Create a Circle Shape Layer:
- Select the
Ellipse Tool (Q)and draw a perfect circle while holding Shift. - Set the Fill color to white and remove the Stroke.
- Select the
- Animate the Scale:
- Press
Yto activate the Anchor Point Tool, then move the anchor point to the bottom of the circle. - Press
Sto open Scale properties. - Set a keyframe at
0swith Scale = 0%. - Move to
1sand change the Scale to 100%. - Press
F9to Easy Ease the keyframes. - Open the Graph Editor and make the curve extreme for a fast initial scale-up that slows down.
- Press
- Duplicate the Circle Layer:
- Press
Ctrl + Dto duplicate it. - Change the color to black and move the layer one frame ahead.
- Adjust the X Scale to 160% and Y Scale to 105% to create organic motion.
- Press
2. Adding a Warp Effect
- Apply Warp Effect:
- Go to
Effects > Distort > Warp. - Set Warp Style to
Arch. - Set a keyframe for
Bendat0and animate to 50 by1s.
- Go to
- Modify X Scale:
- Open Scale properties (S).
- Unlink the proportions and set X Scale to 80%.
- This creates a more dynamic explosion rather than a perfect circle.
- Duplicate the Layers for Variety:
- Rotate each duplicate slightly to create an irregular explosion shape.
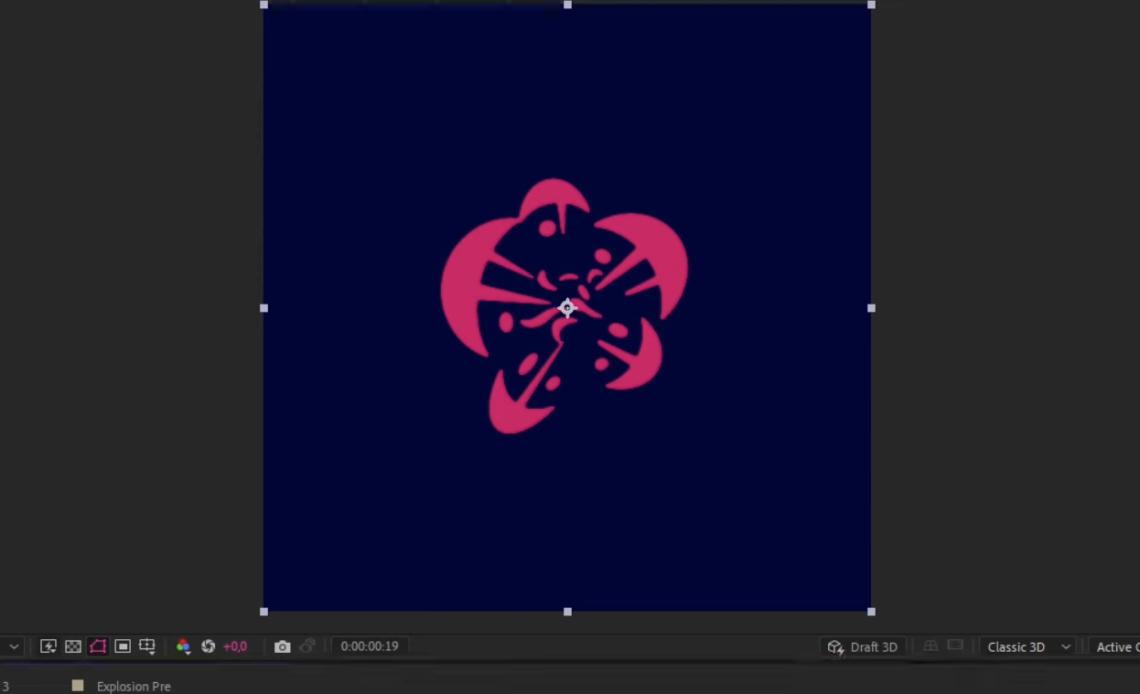
Now, your explosion should be shaping up with unique movements for each burst!
Step 3: Adding Breakup Effects
1. Creating a Cutout Effect
- Draw a Triangle Shape (Cutout):
- Use the
Pen Tool (G)to draw a black triangle positioned at the bottom of the explosion. - Move the Anchor Point to the Bottom (
Ctrl + Alt + Home). - Name it Cutout.
- Use the
- Animate Scale:
- Set X Scale = 0% at 0s.
- At
4 frames, increase X Scale to 100%. - Duplicate and rotate multiple Cutout layers for varied effects.
2. Adding Smoke Trails
- Create a Thin Stroke Line:
- Use the Pen Tool (G) to draw a single stroke extending outward.
- Set the Stroke Width to
40pxand color to pink. - Go to Stroke > Taper, set Start Length to 100%.
- Animate Trim Paths:
- Go to
Shape Layer > Add > Trim Paths. - Set End Keyframe at
0s(value0%). - At
1s, increase End to 100%. - Easy Ease keyframes for smooth growth.
- Go to
- Duplicate and Rotate:
- Duplicate multiple trails, change angles and lengths.
3. Adding Small Puffs
- Create an Oval Shape Layer:
- Set Fill color to pink.
- Animate Position & Scale:
- At
0s, set Scale to 0%. - At
10 frames, scale to100%.
- At
- Move slightly away from the explosion center.
These cutouts, smoke trails, and puffs make the explosion feel organic and hand-drawn.
Step 4: Refining the Explosion
1. Creating Variations
- Duplicate the Pre-Comp 3 Times:
- Rename them Explosion_Var1, Explosion_Var2, Explosion_Var3.
- Inside each, modify:
- Cutout shapes (add/remove).
- Trail timings.
- Circle burst animation speeds.
- Replace in Main Composition:
- Select the new Explosion Pre-Comps.
- Replace them using
Ctrl + Alt + /.
2. Blending and Refining the Look
- Apply Extract Effect:
- Remove black background (
Effects > Keying > Extract).
- Remove black background (
- Add Fast Box Blur:
- Set Blur Radius = 5.
- Apply Levels (Alpha):
- Increase Contrast for sharper edges.
- Use Roughen Edges:
- Remove Fractal Influence.
- Set Border to 5.
Now your explosion looks stylized and dynamic! 💥
Step 5: Adding Impact Frames (Secret Technique)
- Create a New Solid:
- Apply
Fractal Noise(Contrast = 4000). - Set
Transform > Scale Width = 60, Height = 5000. - Apply
Polar Coordinates(Rect to Polarat100%).
- Apply
- Animate Brightness Keyframes:
0s: Brightness0%.1 frame later: Increase to300%.- Trim to 2 frames.
- Add Extract + Blur + Levels:
- Same technique as before.
Now, these high-contrast impact frames will amplify the explosion’s intensity! 🔥
Step 6: Final Touches
- Apply Posterize Time (
Frame Rate = 12). - Use AE Juice Assets (Optional):
- Add Fire Flames 103 (
Effects > Hue/Saturationto recolor).
- Add Fire Flames 103 (
- Use Chromatic Aberration for More Detail.
Conclusion
🎉 Congratulations! You’ve created an epic animated explosion using After Effects!


