Creating a spray-painted stencil text effect in Photoshop is a great way to add a raw, urban, and grungy feel to your designs. Instead of manually painting, we’ll use filters, blending modes, and textures to achieve a realistic spray-paint effect without needing a drawing tablet.
In this tutorial, you’ll learn how to:  Create natural overspray and spray-paint textures
Add grunge details for a realistic feel
Use blending modes and filters to refine the look
By the end, you’ll have a stunning stencil spray-paint effect ready to use in your projects! 

Step 1: Setting Up the Document
- Open Photoshop and create a New Document.
- Set the size to 3840×2160 pixels (4K resolution for high detail).
- Choose a black background.
Step 2: Adding the Text
- Select the Type Tool (T) and type your text.
- Use a bold, stencil-like font such as Mr. Stalwart (a free Google Font).
- Press
Ctrl + Enter(Windows) /Cmd + Return(Mac) to confirm the text. - Resize the text (
Ctrl + T/Cmd + T) and rotate it slightly for a dynamic feel.
Step 3: Preparing the Text for Effects
- Rasterize the Text:
- Right-click the text layer and select Rasterize Type.
- Ensure White Text on Black Background:
- Go to
Edit > Fill (Shift + F5)and set:- Contents: Black
- Blending Mode: Behind
- This ensures that the transparent areas are filled with black.
- Go to
Step 4: Creating the Spray-Paint Effect
- Add a Layer Mask to the Text Layer:
- Click the Mask Button at the bottom of the Layers panel.
- Apply a Cloudy Noise Pattern to the Mask:
- Select the mask and go to
Filter > Render > Clouds. - This creates a random noise pattern.
- Select the mask and go to
- Blur the Mask:
- Apply
Filter > Blur > Gaussian Blurwith a 25px radius.
- Apply
- Increase Contrast in the Mask:
- Press
Ctrl + L(Windows) /Cmd + L(Mac) for Levels. - Adjust Black Input:
80, White Input:175.
- Press
This creates a randomized spray effect around the edges.
Step 5: Blurring the Spray-Paint Effect
- Apply a Lens Blur to the Text:
- Select the text layer and go to
Filter > Blur > Lens Blur. - In the Depth Map Source, choose Layer Mask.
- Set Radius to
100. - Keep Iris Shape as Pentagon and set other values to
0.
- Select the text layer and go to
- Fade the Blur Effect:
- Immediately after applying Lens Blur, go to
Edit > Fade Lens Blur(Ctrl + Shift + F). - Reduce the Opacity to 80% for more definition.
- Immediately after applying Lens Blur, go to
Now, the text looks like real spray paint, but we need to refine it further!
Step 6: Creating the Speckled Spray Paint Look
- Change the Blending Mode of the Text Layer to Dissolve.
- Convert White Areas to Transparency:
- Select the text layer and press
Ctrl + A, thenCtrl + Cto copy. - Click on the mask, press
Alt + Click, and thenCtrl + Vto paste the text into the mask.
- Select the text layer and press
- Fill the Layer with White:
- Press
Dto reset colors. - Press
Ctrl + Backspaceto fill with white.
- Press
- Reduce Opacity to 97%:
- This adds small speckles of paint for a more natural look.
- Merge with Background for Smoother Edges:
- Unlock the background layer and press
Ctrl + Eto merge. - Apply a 0.5px Gaussian Blur to smooth the dissolve effect.
- Unlock the background layer and press
Step 7: Adding Real Spray-Paint Texture
- Import a Real Spray Paint Texture (
InkPaint170from TextureLabs). - Invert the Image (
Ctrl + I). - Transform (
Ctrl + T) and Position the Texture where you want more detail. - Set Blending Mode to Screen for realistic highlights.
This extra detail enhances the authenticity of the spray-paint look! 
Step 8: Adding Color Details
- Import a Colored Spray Texture (
InkPaint182). - Apply Color Overlay:
- Go to
Effects > Color Overlay. - Choose a red color.
- Go to
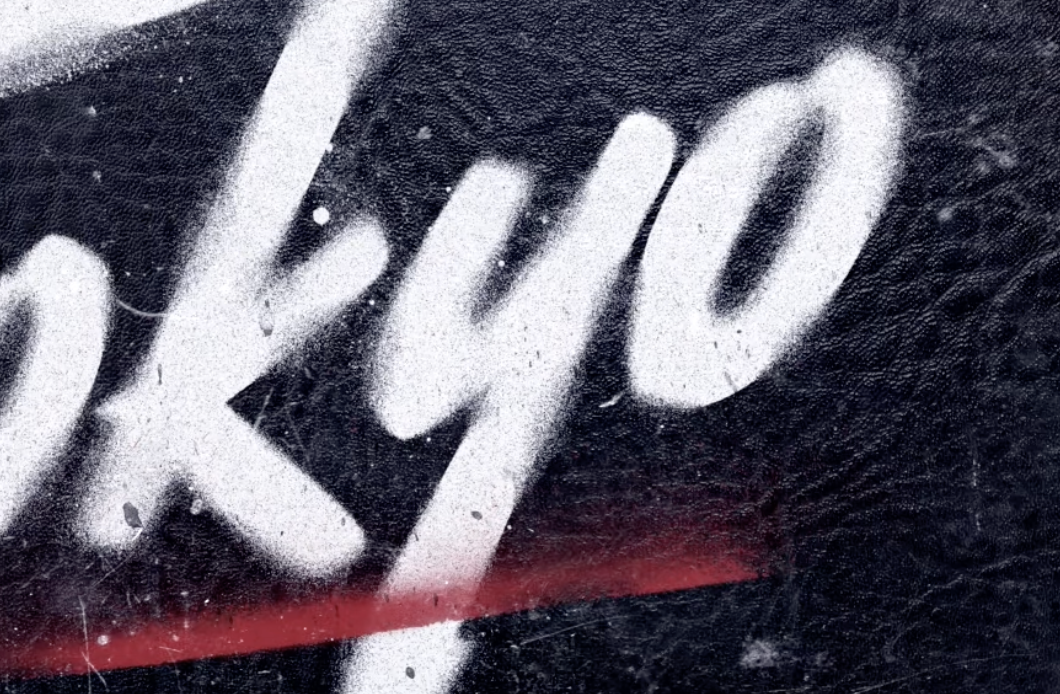
- Position the Texture as an Underline for a cool graffiti effect.
Step 9: Creating a Realistic Background
- Import a Leather or Rough Surface Texture (
Fabric148). - Adjust Brightness & Contrast for better contrast.
- Set the Stencil Text Layer to Screen Mode.
- Reduce Opacity to 80% so the texture shows through slightly.
Step 10: Adding Grunge Elements
- Import a Black Grunge Texture (
Grunge120). - Set Blending Mode to Screen to reveal white paint splatters.
- Import a White Grunge Texture (
Grunge121). - Set Blending Mode to Multiply to add darker grunge elements.
- Use Levels (
Ctrl + L) to increase contrast.
Step 11: Final Adjustments
1. Apply Levels Adjustment to the Entire Image
- Go to
Image > Adjustments > Levels. - Adjust:
- Black Point:
6 - White Point:
210 - Midtones:
1.15
- Black Point:
2. Adjust Blue Channel for Realism
- In Levels, switch from RGB to Blue Channel.
- Lower midtones to 1.15 for a cool-toned effect.
This step ties everything together with a realistic, cohesive look!
Conclusion
 Congratulations! You’ve created a stunning spray-painted stencil effect in Photoshop!
Recap:
Used Lens Blur and Dissolve Mode for realistic spray textures.
Applied real paint textures for added realism.
Enhanced the effect with grunge overlays and background textures.
Finalized with Levels & Color Adjustments to balance the composition.
 Now it’s your turn! Try this effect with different fonts, colors, and textures to create your own unique graffiti-style design!