Introduction
Vintage text effects bring a nostalgic and classic touch to design projects, often used in posters, branding, packaging, and logos. In this tutorial, we will explore how to create an elegant Vintage Text Effect in Adobe Illustrator using alternate letters, vector elements, and layer effects.
By the end of this guide, you’ll learn how to:
- Apply alternate letter styles for a unique typography design.
- Use the Appearance Panel to layer multiple effects.
- Add offset paths and strokes to create depth and contrast.
- Use vector ornaments and frames to complete a balanced composition.
Let’s get started!
Step 1: Setting Up Your Illustrator Document
- Open Adobe Illustrator and create a new document (1920×1080 pixels, RGB mode for screen display or CMYK for print).
- Select the Rectangle Tool (M) and create a black background to enhance the vintage effect.
- Lock the background layer by clicking on Object > Lock > Selection to prevent accidental edits.
Step 2: Choosing a Vintage Font and Typing the Text
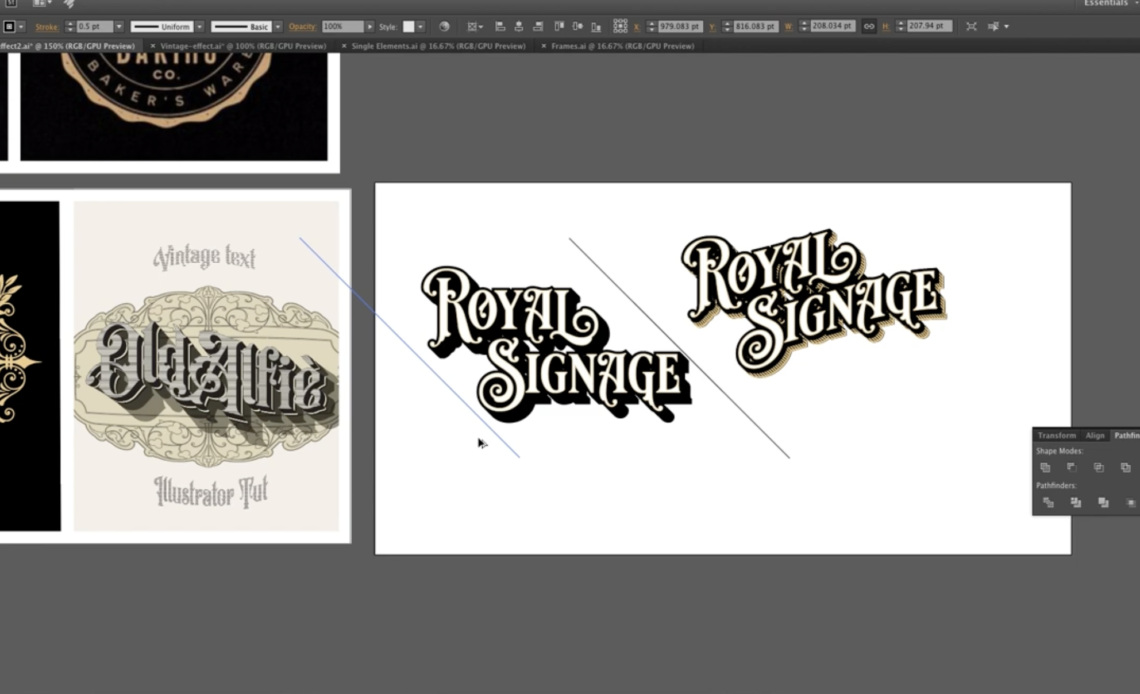
- Select the Type Tool (T) and type the word “ROYAL SIGNAGE”.
- Use a vintage-style font like Royal Signic from a premium font bundle.
- Adjust the size using Ctrl + T (Windows) / Cmd + T (Mac) to scale it proportionally.
- Set the font color to white for strong contrast.
Step 3: Using Alternate Letters for a Unique Look
How to Access Alternate Letters:
- Highlight the text and open the OpenType Panel (Window > Type > OpenType).
- Click on the Stylistic Alternates (Aa icon) to see available variations.
- Modify specific letters such as:
- Change “R” to an ornamental alternate.
- Adjust “S” in “SIGNAGE” for a curled tail.
- Swap out other letters for artistic flourishes.
- Open the Glyphs Panel (Type > Glyphs) to manually select unique character variations.
Once the alternate characters are applied, the text gains an authentic handcrafted vintage feel.
Step 4: Converting Text to Outlines
- Select the text and Right-click > Create Outlines.
- This converts the text into vector shapes, allowing further customization.
- Ungroup the text (Object > Ungroup) if needed.
Step 5: Applying the Offset Path Effect for Depth
- Select the outlined text and go to Object > Path > Offset Path.
- Set the Offset Value to 2.5 px and preview the result.
- Click OK to create an outer stroke effect.
- Set the Offset Path color to black for a bold contrast.
Repeat this step to create additional layers:
- A second Offset Path with a lighter color to create a 3D effect.
- A third Offset Path in black for added depth.
Step 6: Adding Stroke Effects for a Classic Vintage Look
- Select the main text and open the Appearance Panel (Window > Appearance).
- Click Add New Stroke, set the color to gold (#F0CB88), and increase the stroke weight to 1.5px.
- Add another inner stroke in black for contrast.
- Set the stroke to Align to Center for a balanced appearance.
Step 7: Creating a 3D Depth Effect with Blending
- Select the offset path layers and go to Object > Blend > Make.
- Open the Blend Options and choose Specified Steps: 120.
- Click OK, then Expand the Blend (Object > Expand).
- Merge the shapes using the Pathfinder > Unite.
This step creates a smooth 3D transition between the layers.
Step 8: Adding Vintage Vector Ornaments
- Open a Vector Ornament Pack (Download from a premium resource if needed).
- Drag and drop an ornamental frame from the collection onto your document.
- Scale it to fit around the text using Shift + Drag.
- Change the frame color to match the gold stroke (#F0CB88).
- Align the frame to the center using Align Panel (Window > Align).
For extra detail:
- Add floral elements or filigree designs to the corners.
- Use swirls and borders to complete the vintage aesthetic.
Step 9: Adding Text on a Circular Path
- Select the Ellipse Tool (L) and draw a circle above the text.
- Select the Type on a Path Tool (Shift + T) and click on the circle’s edge.
- Type a secondary phrase like “PREMIUM VINTAGE DESIGN”.
- Adjust spacing with Character Panel > Tracking to align text evenly.
- Resize and position the circular text above the main text.
Step 10: Creating a Vintage Background Pattern
- Use Pen Tool (P) to create diagonal lines for a subtle texture.
- Apply a thin stroke (0.5 px) in dark gray.
- Duplicate and blend the lines using Object > Blend > Make.
- Set the blending mode to Multiply to create a vintage shading effect.
Step 11: Final Adjustments and Exporting
- Select the entire composition and Group (Ctrl + G) to keep elements organized.
- Fine-tune the positioning of text and ornaments.
- Apply Curves Adjustment for better contrast (Effect > Adjust Colors > Curves).
- Save the file in AI format for future editing.
- Export as PNG (300 DPI) for digital use or PDF (CMYK) for printing.
Conclusion
Congratulations! You have successfully created a Vintage Text Effect in Adobe Illustrator.
Key Takeaways:
- Alternate Letters: Use the OpenType panel to swap out characters.
- Offset Paths & Strokes: Layer multiple effects for depth.
- Vector Elements: Add filigree and ornamental shapes for elegance.
- Blending & 3D Depth: Use the Blend Tool to create smooth shading.
- Text on Path: Use circular text to enhance the composition.
This technique is widely used in retro branding, poster designs, and logo creation. Experiment with different fonts, colors, and ornaments to make your own unique vintage designs.
If you enjoyed this tutorial, like, share, and subscribe for more Illustrator design tips!