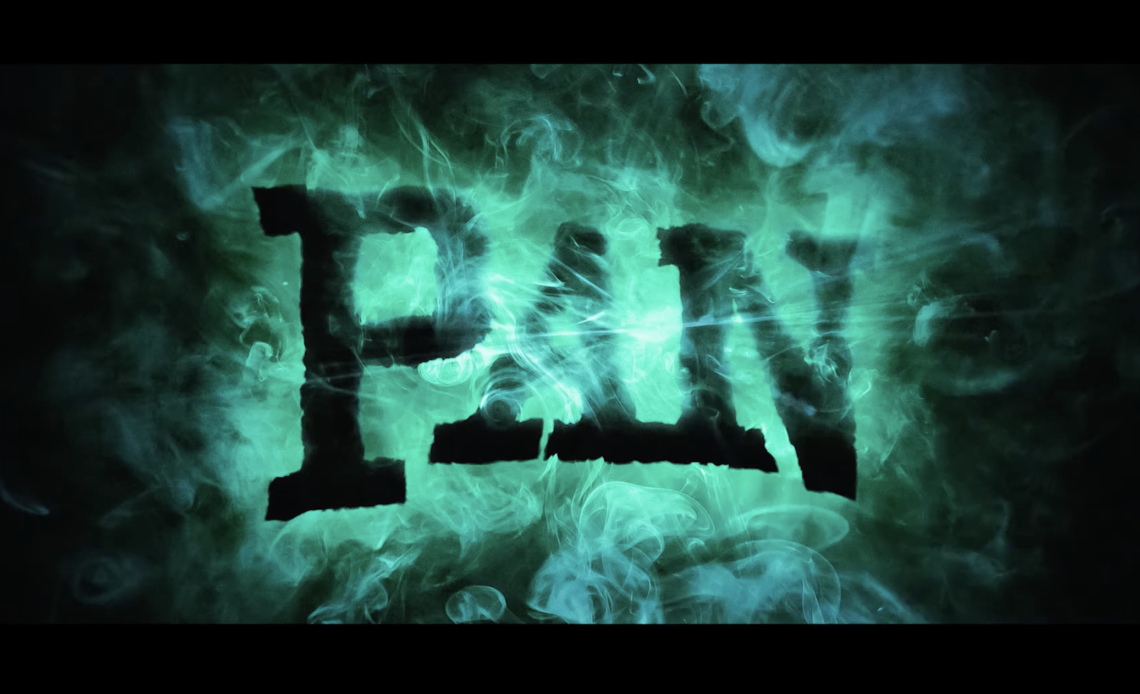
Creating a magical smoke text effect in Photoshop is an exciting way to add fantasy-inspired design elements to your projects. This method requires no painting, relying instead on layer styles, blending modes, and textures to achieve an ethereal smoke effect around text.
This tutorial will guide you step by step to create this effect effortlessly. By the end, you’ll know how to: ✅ Use textures to drive the smoke effect ✅ Apply advanced layer blending modes ✅ Create soft, natural smoke edges✅ Enhance the effect with light and color adjustments
Let’s dive in!
Step 1: Setting Up the Photoshop Document
1. Create a New Document
- Open Adobe Photoshop and create a new document with dimensions 1920×1080 pixels (HD resolution).
- Fill the background with black to enhance the smoke effect.
2. Add the Text Layer
- Use the Type Tool (T) to type your text.
- Select a bold font, such as Tondu (recommended for this effect).
- Set the text color to white for high contrast against the black background.
Step 2: Importing the Smoke Texture
A smoke texture will be the key element to creating the magical effect.
1. Place the Smoke Texture
- Download a high-quality smoke texture (e.g., Texturelabs Atmosphere 195).
- Copy and paste the texture above the background layer.
- Press
Ctrl + T(Cmd + Ton Mac) to scale it to fit the width of the canvas. - Rename the layer to “smoke”.
This texture will later be used to blend the text with a smoky effect.
Step 3: Creating the Smoke Displacement Effect
To distort the text edges naturally, we’ll use a non-destructive displacement technique.
1. Apply a Stroke Effect to the Text
- Select the Text Layer and open the Layer Effects Menu (
Fx). - Apply the Stroke Effect and reset it to default settings.
- Change the Fill Type to Gradient.
- Increase the Stroke Size to 150 px.
- Set the Position to Center.
- In the Gradient Style, select Shape Burst.
- Click OK.
At first, the text may look blurry, but this effect will be transformed into a smoke distortion in the next steps.
2. Group the Text Layer
- Select the text layer and press
Ctrl + G(Cmd + Gon Mac) to create a group. - This isolates the stroke effect so we can manipulate it without affecting other layers.
3. Apply a High-Pass Filter to the Smoke Texture
- Duplicate the smoke texture by holding
Alt(Optionon Mac) and dragging the layer. - Move it above the text group.
- Go to Filter > Other > High Pass.
- Set the Radius to 30 px and press OK.
- This keeps only the finer smoke details, removing background distractions.
4. Use a Clipping Mask and Blending Mode
- Hold Alt (Option) and click between the smoke texture and text group to create a Clipping Mask.
- Set the blending mode to Hard Mix.
- Reduce Fill Opacity to 95% for a softer blend.
Now, the smoke texture will dynamically distort the edges of the text, creating an organic smoke effect!
Step 4: Refining the Smoke Effect
1. Inverting the Smoke Displacement
- Select the smoke texture and press
Ctrl + I(Cmd + Ion Mac) to invert it. - This reverses the smoke direction, adding more variation.
2. Adjusting Transparency
- Right-click the Text Group → Blending Options.
- Under Blend If, hold
Alt(Option) and drag the black slider to the right. - This makes black areas transparent, leaving only the smoke effect.
Now the text seamlessly integrates with the smoke, appearing as if it’s dissolving!
Step 5: Adding Extra Smoke Layers
To make the effect more immersive, we’ll add multiple layers of smoke.
1. Duplicate and Rename Smoke Layers
- Duplicate the original smoke texture three times (
Ctrl + J/Cmd + J). - Rename them:
- “Smoke Fill Color” (Below Text)
- “Smoke Overlay” (Above Text)
- “Smoke On Top” (Final Layer)
2. Blend the Smoke Layers
- “Smoke Fill Color”: Clip this layer to the text group.
- “Smoke Overlay”: Set blending mode to Overlay.
- “Smoke On Top”: Adjust Blend If settings to make parts of the smoke semi-transparent.
This layering technique creates a realistic, multi-depth smoke effect.
Step 6: Enhancing the Effect with Glow and Shadow
1. Apply Inner Glow and Outer Glow
- Select the Text Group and apply Inner Glow:
- Opacity: 100%
- Size: 40 px
- Apply Outer Glow:
- Opacity: 55%
- Size: 200 px
2. Create an Inner Shadow
- Apply Inner Shadow:
- Opacity: 100%
- Distance: 50 px
- Angle:
-90° - Size: 250 px
These adjustments create depth and realism, making the smoke look dynamic and magical.
Step 7: Final Touches with Particles and Color Grading
1. Add a Magical Particle Texture
- Import Atmosphere 149 (Snow Texture).
- Set blending mode to Linear Dodge.
- Lower Fill Opacity to 65%.
2. Brighten the Overall Effect
- Add a Levels Adjustment Layer (
Ctrl + L). - Increase the White Input to brighten highlights.
3. Apply a Gradient Map for Color Styling
- Add an Adjustment Layer > Gradient Map.
- Create a custom gradient:
- Shadows: Deep Purple
- Midtones: Saturated Blue
- Highlights: Light Green
- Save this gradient as a preset for future use.
The final effect will have vibrant, glowing smoke swirling around the text, perfect for fantasy or sci-fi designs!
Conclusion
🎉 Congratulations! You’ve created an epic magical smoke text effect using only Photoshop’s built-in tools.


