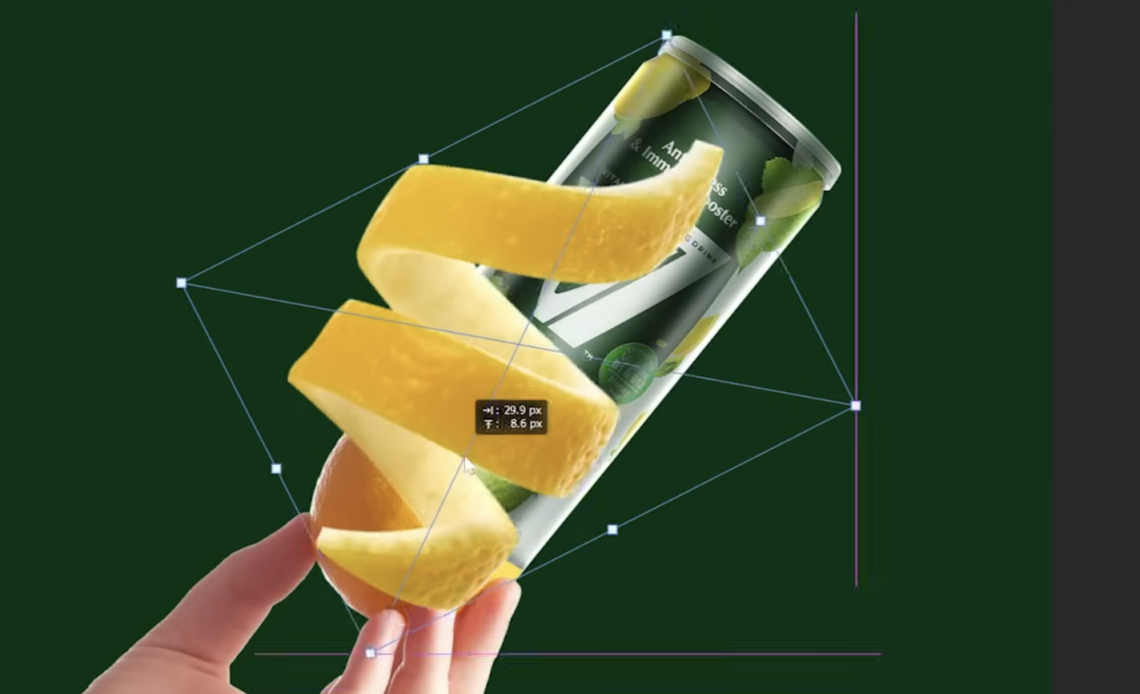
Creating a stunning advertising poster requires a combination of retouching, compositing, color grading, lighting, and shadow techniques. In this in-depth Photoshop tutorial, we will walk through the process of crafting a high-end advertising poster from scratch, using an Egyptian sparkling drink as an example.
By the end of this guide, you’ll have mastered: ✔ Professional product retouching techniques ✔ Lighting & shadow adjustments to create realism ✔ Color grading for a polished commercial look ✔ Special effects like water splashes and glow effects ✔ Typography and branding techniques
Let’s get started! 🚀
Step 1: Understanding the Advertising Concept
Every advertising poster starts with a core concept. The product we’re designing for is a sparkling lemon-lime drink, and the key message is refreshment and energy. The goal of this ad is to capture attention, emphasize the brand identity, and convey a sense of freshness and excitement.
Key Elements of the Design:
- The bottle/can as the primary focus
- Lemon and lime slices to reinforce the flavor
- Water splashes to enhance the feeling of refreshment
- Dynamic background lighting to make the product pop
- Vibrant colors to align with branding and attract attention
- Typography that complements the product’s message
Now that we have a clear idea, let’s move on to creating our design in Photoshop.
Step 2: Setting Up the Photoshop Document
- Open Photoshop and create a new document (3000x4000px at 300 DPI).
- Set the color mode to RGB (for digital ads) or CMYK (for print ads).
- Fill the background with a dark gradient transitioning from deep green to black.
- Create guidelines for symmetry and layout positioning.
- Name and group layers properly to maintain an organized workflow.
This will serve as the base for our high-contrast lighting effects later.
Step 3: Preparing and Retouching the Product Image
The product image we’re using is not a professional shot—it was taken with a mobile phone and has poor lighting and noise. We’ll need to enhance it significantly.
Enhancing the Product Image:
- Convert to a Smart Object (Right-click > Convert to Smart Object).
- Open Camera Raw Filter (Filter > Camera Raw Filter) and adjust:
- Contrast (+25)
- Highlights (-15)
- Shadows (-30)
- Texture & Clarity (+10 each)
- Noise Reduction (+20)
- Click OK to apply the adjustments.
Removing Imperfections:
- Use the Clone Stamp Tool (S) to remove unwanted reflections and scratches.
- Use the Spot Healing Brush (J) to clean up minor defects.
- Apply Frequency Separation to smooth out the surface while preserving texture.
- Ensure the bottle or can appears sleek and visually appealing.
Step 4: Adding Realistic Lighting and Shadows
To create a three-dimensional look, we need to add custom lighting and shadows.
1. Creating Shadows:
- Add a Solid Color Adjustment Layer (choose dark green).
- Set its Blending Mode to Multiply.
- Use a soft brush (B) to paint shadows on the product’s sides.
- Adjust the opacity for a natural effect.
2. Creating Highlights:
- Add a new Solid Color Adjustment Layer (pure white).
- Set its Blending Mode to Screen.
- Use a soft brush to paint highlights on the product’s edges.
- Lower the opacity for a natural effect.
- Apply a Curves Adjustment Layer to fine-tune the contrast.
💡 Pro Tip: Use the Dodge & Burn tool for extra realism.
Step 5: Integrating Lemon & Lime Slices
Lemon and lime slices will reinforce the flavor concept and add depth to the composition.
Placing the Lemon & Lime Slices:
- Import high-resolution lemon and lime slice images.
- Use the Object Selection Tool (W) to extract them.
- Convert them into Smart Objects.
- Use Ctrl+T (Cmd+T on Mac) > Warp Tool to adjust their shapes slightly.
- Apply Motion Blur to some slices for dynamic movement.
💡 Pro Tip: Use Blending Options > Inner Shadow to create depth.
Step 6: Adding Water Splashes for Freshness
Water splashes help convey the idea of cold refreshment.
Steps to Add Realistic Water Splashes:
- Import a water splash PNG image.
- Change the Blending Mode to Screen.
- Adjust brightness using Levels (Ctrl+L).
- Duplicate and resize different splashes for variety.
- Add motion blur to selected splashes.
Step 7: Creating a Dynamic Background Effect
To enhance focus on the product, let’s add glowing light effects.
1. Adding Glow:
- Create a New Layer.
- Select a soft brush, pick a bright green/yellow color.
- Click once to add a glow effect behind the product.
- Set Blending Mode to Overlay or Soft Light.
- Add Lens Flare (Filter > Render > Lens Flare) for extra impact.
2. Creating a Radial Light Effect:
- Create a Radial Gradient from white to transparent.
- Set Blending Mode to Overlay.
- Position it behind the product to create depth.
💡 Pro Tip: Use Gaussian Blur for smoother glow effects.
Step 8: Typography & Branding
Every advertising poster needs a strong tagline that reinforces the brand message.
1. Creating the Headline:
- Select a bold, modern font (e.g., Bebas Neue, Montserrat).
- Write: “Unleash the Ultimate Refreshment”.
- Convert to Smart Object and apply slight Warp Transformation.
- Set Blending Mode to Overlay to interact with the background.
2. Adding Secondary Text:
- Use a thin sans-serif font for the product description.
- Align it below the main headline.
- Reduce opacity slightly for subtle contrast.
💡 Pro Tip: Add a Drop Shadow to make text pop.
Final Color Grading & Exporting
1. Applying Color Enhancements:
- Use Selective Color Adjustment Layer to boost yellows and greens.
- Add a Curves Layer to increase contrast.
- Use Vibrance Adjustment for more punch.
2. Exporting:
- For print: TIFF or PDF (CMYK, 300 DPI)
- For digital: PNG or JPEG (RGB, 72 DPI)
Conclusion
This guide covered: ✔ Professional product retouching ✔ Dynamic lighting and shadows ✔ Engaging background effects ✔ Eye-catching typography and branding ✔ Final color grading for a polished look


