Creating a fog and text portrait in Adobe Photoshop is an artistic way to blend typography with atmospheric elements, resulting in a unique and cinematic design. This tutorial will walk you through the step-by-step process of integrating text, fog, and a portrait into a compelling composition using simple Photoshop techniques.
By the end of this guide, you’ll learn how to: ✅ Use text as a design element in portrait compositions ✅ Apply fog effects to create depth and atmosphere ✅ Enhance images with blur, blending modes, and color grading ✅ Use Photoshop’s Camera Raw filter for final adjustments
Let’s get started!
Step 1: Setting Up the Photoshop Document
1. Create a New Document
- Open Adobe Photoshop and create a new document.
- Set dimensions to 3840×2160 pixels (4K resolution) for high-quality output.
- Choose a neutral gray background to start.
2. Add Text to the Canvas
- Select the Type Tool (T).
- Choose a bold font, such as Camberwell (linked in the description).
- Type a word or phrase that complements the theme.
- Use Ctrl + T (Cmd + T on Mac) to transform and scale the text.
- Change the text color to bright yellow, adjusting saturation to avoid extreme tones.
This text will serve as a strong design element in our composition.
Step 2: Importing and Preparing the Portrait
1. Select a Portrait Image
- Download a high-quality portrait from a free stock photo site like Pexels (Photo by Matt Hardy).
- Unlock the background layer in the Layers panel.
2. Remove the Background
- Go to the Properties panel and click Remove Background (works best if the subject is well-separated from the background).
- Right-click on the mask > Apply Layer Mask.
- Copy and paste the cut-out portrait into the main document.
- Press
Ctrl + T(Cmd + T on Mac) to scale and position the model over the text.
Now, we have a clean cut-out portrait ready for the next steps.
Step 3: Adding Fog Textures
Fog effects create a mystical and cinematic feel. We’ll use free textures from TextureLabs.org.
1. Import a Fog Texture
- Download a fog texture and place it in Photoshop.
- Press
Ctrl + T(Cmd + T on Mac) to scale it to match the canvas width. - Rename the layer to
Fog. - Drag the original background to the trash to keep the workspace clean.
2. Create a Layering System for the Fog
- Duplicate the fog layer (
Ctrl + J/Cmd + Jon Mac) twice. - Arrange the layers to form a fog sandwich:
- One fog layer in the background
- One fog layer between the text and the model
- One fog layer on top of the portrait
- Turn off the top fog layer for now.
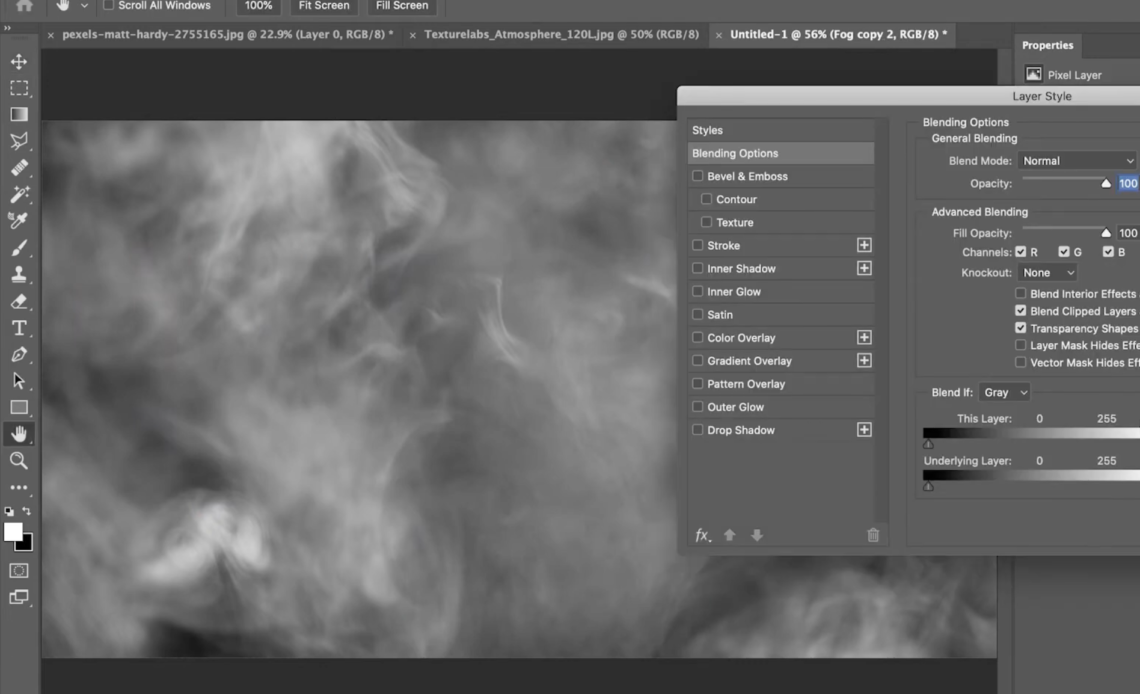
3. Adjust Fog Blending Modes
- Middle Fog Layer:
- Double-click the layer to open Blending Options.
- Hold Alt/Option and drag the black slider up to
200. - This makes dark areas more transparent while keeping lighter fog visible.
- Top Fog Layer:
- Open Blending Options.
- Drag the black slider to 150 and the white slider to 55.
- Add a layer mask, use a soft Brush Tool (B), and erase areas where the fog should be lighter.
This creates a layered, natural fog effect with smooth blending.
✅ Pro Tip: Fog textures are forgiving, so you can be rough with masking and still achieve a great effect.
Step 4: Creating Depth with Blur Effects
Blurring background elements enhances depth of field, making the portrait stand out.
1. Blur the Text Layer
- Select the Text Layer.
- Go to
Filter > Blur > Gaussian Blur. - Rasterize the text and set the blur radius to 5 pixels.
2. Apply an Iris Blur to the Portrait
- Select the Model Layer.
- Go to
Filter > Blur Gallery > Iris Blur. - Adjust the blur circle, keeping the face sharp while blurring the edges.
- Set the blur strength to 6 pixels.
This technique mimics a camera lens effect, adding depth and focus.
Step 5: Adding a Cinematic Color Overlay
A subtle color overlay can unify the entire composition.
1. Create a Solid Color Adjustment Layer
- Go to
Layer > New Adjustment Layer > Solid Color. - Choose a foggy blue color.
- Set the blending mode to Soft Light.
2. Apply a Radial Gradient Mask
- Select the mask of the Solid Color Layer.
- Use the Gradient Tool (G) set to Radial Gradient.
- Drag from the center outward to create a vignette-like fade.
This enhances the cinematic atmosphere while subtly coloring the fog.
Step 6: Final Enhancements with Camera Raw Filter
For a professional finish, apply Camera Raw adjustments.
1. Merge Layers for Editing
- Press
Ctrl + Alt + Shift + E(Cmd + Option + Shift + E on Mac) to create a merged copy of the entire composition. - Select the new merged layer.
2. Open Camera Raw Filter
- Go to
Filter > Camera Raw Filter. - Adjust:
- Exposure: Increase slightly for brightness.
- Contrast: Boost to deepen shadows.
- Clarity & Texture: Adjust for sharpness.
- Sharpening (Detail Panel): Add a touch of crispness.
- Effects Panel: Add a small amount of grain.
- Vignette: Reduce to emphasize the center.
3. Preview Before & After
- Toggle the before/after button to compare results.
- If needed, refine shadows, highlights, and temperature.
This final step polishes the image, making it look like a professional movie poster.
Conclusion
Congratulations! 🎉 You’ve created a stunning fog and text portrait in Photoshop using layer masks, blending modes, and Camera Raw adjustments.