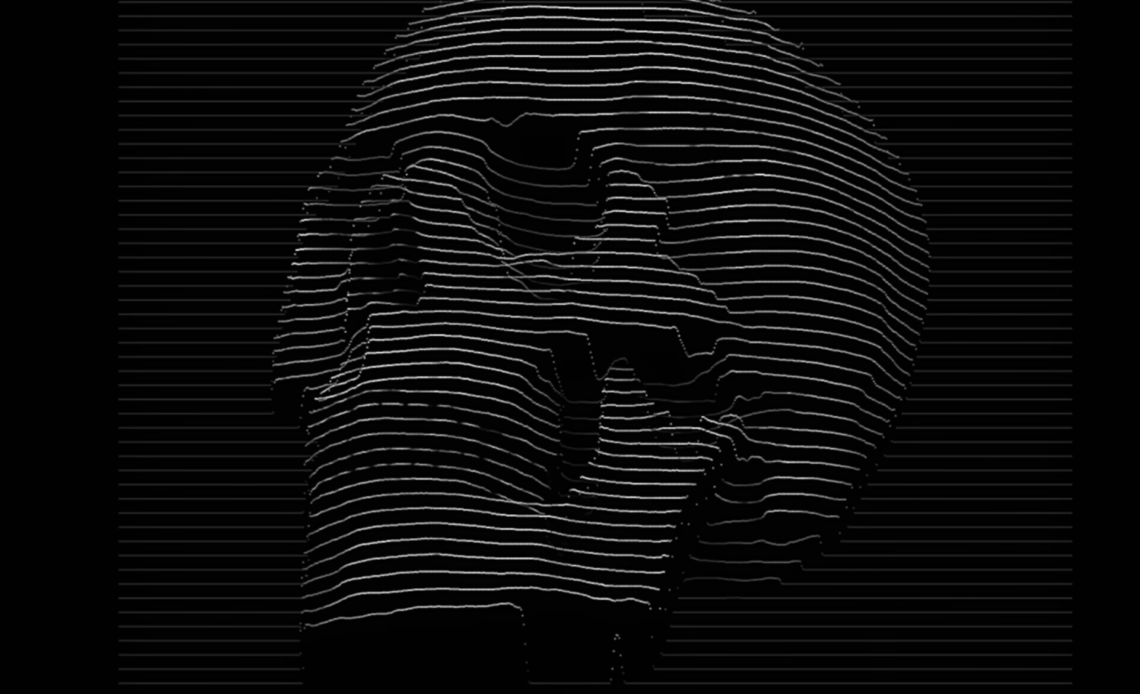
Waveform Depth Scan Effect in Adobe Photoshop: A Step-by-Step Guide
Introduction
In this tutorial, we’ll explore an ambitious and experimental technique in Photoshop—creating a waveform depth scan effect. This effect mimics the look of wireframe wave scans and is inspired by the Joy Division album cover.
By using a simple yet clever Photoshop Action, we can automate the process, making it easy to generate different variations of this effect. In this guide, we’ll cover everything from setting up the action to using depth maps for more advanced results.
Let’s get started!
Understanding the Concept
Our goal is to take a source image and create multiple horizontal rows of white pixels. These rows will then be distorted based on the light and dark values of the original image.
The key component in achieving this effect is Photoshop’s Displace filter. However, using it the standard way won’t give us the desired outcome, so we need to approach it more strategically. By carefully setting up the document and structuring our layers, we can effectively manipulate displacement for a clean, structured wave effect.
Setting Up the Photoshop Document
- Create a New Document
- Open Photoshop and create a document with a height of 2000 pixels. This size works well with the Displace filter.
- Add the Required Layers
- Depth Layer: This will control the height of the waveforms. To start, apply Render Clouds.
- Color Layer: Determines the color of the wave lines. You can set this to white or experiment with colors.
- Solid Black Layer: This acts as the background. Fill it with black using
Option + Delete(Mac) orAlt + Backspace(Windows). - White Stripe Layer: Create a single row of white pixels using the Marquee tool and fill it with white (
Command + Deleteon Mac orCtrl + Backspaceon Windows).
- Save the File
- Save this document as
wave_template.psd.
- Save this document as
Creating the Photoshop Action
- Open the Actions Panel (
Window > Actions) - Create a New Action
- Click the
+button and name it Depth Waves. - Click
Recordto begin capturing steps.
- Click the
- Record the Action Steps
- Solo the White Stripe Layer (
Alt + Clickon its eyeball icon). - Crop the Image (
Image > Trim> Trim based on Transparent Pixels). - Solo the Depth Layer and Save the File (
Command + S). - Undo the Crop by using the History Panel to go back two steps.
- Reveal the White Stripe Layer (
Alt + Clickon its eyeball again). - Copy the White Stripe (
Command + C). - Apply Color from the Color Layer (
Image > Apply Image, select Color Layer, enable Preserve Transparency). - Use the Displace Filter (
Filter > Distort > Displace, set to 0 Horizontal, 100 Vertical, Stretch to Fit). - Merge the Displaced Stripe onto the Black Layer (
Command + E). - Paste the Original Stripe Back In (
Command + Shift + V). - Move the White Stripe Down 30 Pixels (
Command + T, adjust Y position). - Stop the Recording in the Actions panel.
- Solo the White Stripe Layer (
Running the Action to Generate the Effect
Now, you can repeatedly play the action to generate additional wave layers. Every time you run the action, the white stripe will move down and be displaced, progressively building the waveform depth scan effect.
To speed up the process, you can hold down the play button and let Photoshop automate the entire effect!
Advanced Enhancements: Using Depth Maps
To improve the illusion of depth, we can replace the depth layer with a depth map.
What is a Depth Map?
A depth map is a grayscale image where lighter areas represent objects that are closer, and darker areas represent objects further away. By using depth maps, we can create the effect of 3D wireframes.
Creating a Depth Map in Photoshop
- Select the Subject Layer
- Go to Neural Filters (
Filter > Neural Filters). - Enable Depth Blur
- Turn on
Depth Blurand disableFocus Subject. - Scroll down and enable
Output Depth Map Only.
- Turn on
- Invert the Depth Map (
Command + Ito invert the colors). - Rename the Layer to “Depth”
- Run the Action Again
Now, the waves will follow the depth contours of the image, making it look more like a wireframe model.
Experimenting with Different Depth Maps
You can generate depth maps using:
- Photoshop Neural Filters (as shown above).
- 3D Rendering Software (for accurate depth representation).
- AI Depth Map Generators (e.g., Stable Diffusion, though results vary).
Try swapping the depth map with different images to create unique variations of the effect.
Refining the Look
To make the final image more visually appealing, consider:
- Adding Color Toning
- Use Gradient Maps or Color Balance to create a cyberpunk or retro look.
- Adding Glow Effects
- Duplicate the waveform layer, blur it slightly (
Gaussian Blur), and set the blend mode toScreen.
- Duplicate the waveform layer, blur it slightly (
- Mixing Elements
- Combine different wave effects or overlay multiple scans to create more complex compositions.
Conclusion
This Photoshop action provides an automated way to create stunning waveform depth scans. By leveraging displacement maps and depth maps, you can take this effect even further, producing results that resemble 3D wireframes.
We hope you enjoy experimenting with this technique! Let us know how you use it in your projects, and stay tuned for more Photoshop tutorials. 🚀


