Welcome! In this tutorial, I’ll guide you through the process of creating an audio visualizer in Adobe After Effects. By following these step-by-step instructions, you’ll learn how to design a captivating audio player with a cover image, text details, and music controls. Additionally, we’ll explore how to create an animated audio equalizer that synchronizes with the music. Let’s get started!
Follow this Complete Tutorial as Youtube Video
Step 1: Setting up the Composition
Create a new composition and name it “Final Comp.” This composition will contain all the elements of our audio visualizer. Add a new solid layer for the background.
Step 2: Creating the Cover Image Placeholder
To create the cover image placeholder, use a shape layer. Duplicate it and adjust the size to your desired dimensions. Pre-compose this shape layer and name it “Cover Album Placeholder.” Enable the “Region of Interest” option and refine the region as needed. Import your cover image and place it within the placeholder. Adjust the width if necessary.
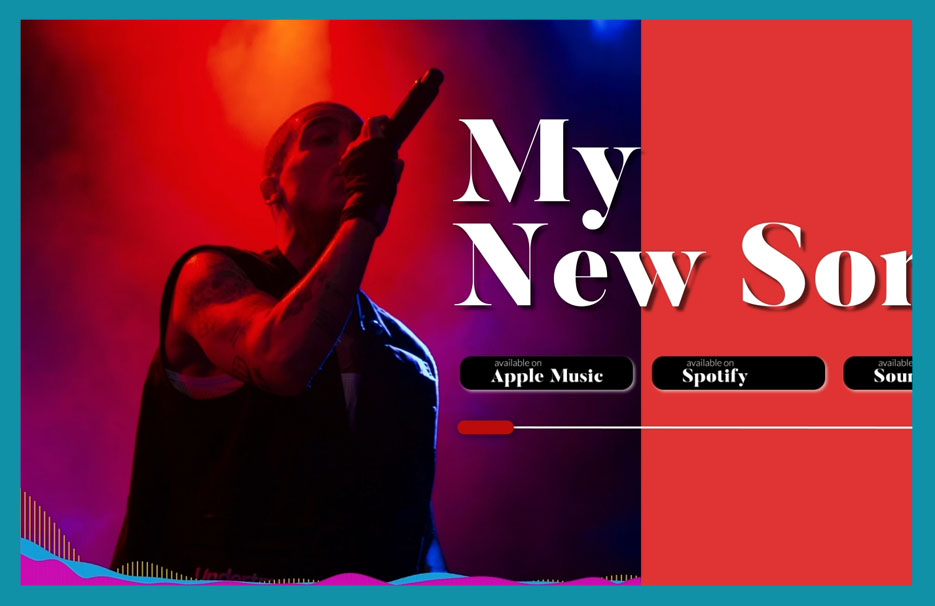
Step 3: Adding Text Details
Choose a font, such as “Butler,” and apply it to your text. Increase the font size and apply a drop shadow effect to give it depth. Adjust the shadow settings for a visually appealing effect. You can also use the typography animations from the text Animation See Below
Kinetic title Animation Tutorial in After Effects
Step 4: Creating the Music Player
Switch to the proportional grid and use the pen tool to create a music player shape. Enable the stroke and adjust the color and size as desired. Duplicate the shape, increase the stroke size, and change the color. Apply a round cap to the stroke and add trim paths. Adjust the trim paths keyframes to create an animated effect. Apply a drop shadow effect to the player for depth. Duplicate the player shape for additional buttons and adjust their size and positions. Add logos or icons to represent different music platforms.
See Also: Creating a Minimilistic Audio Visualizer in After Effects
Step 5: Adding the Audio Visualizer
Create a new solid layer and name it “Audio Equalizer.” Apply the “Audio Spectrum” effect to this layer. Define the area where the visualizer will appear by creating a mask around the edge of the album cover. Make adjustments to the audio spectrum settings to achieve the desired effect. Replace the music source with your own audio file. Set the keyframes for the trim paths to synchronize with the duration of your music.
Step 6: Customizing the Audio Visualizer
To change the color of the equalizer, apply the “Fill” effect and modify the color settings. Experiment with different colors to match your album cover or personal preference. Make further adjustments to the equalizer settings and keyframes as needed.
Step 7: Fine-tuning and Animating
Refine the animation by tweaking the shapes, applying effects to the text and buttons, or adding additional animations. For example, you can animate the shapes or apply effects to the text and buttons to make them appear more dynamically.
Step 8: Preview and Final Touches
Preview your audio visualizer to see how it synchronizes with the music. Make any necessary adjustments to timing, colors, or effects to achieve the desired result. Once you’re satisfied, share your creation with others and don’t forget to subscribe to my channel for more tutorials.
Also See How to Create 3d Title in After Effects
Conclusion:
Congratulations on creating your own audio visualizer in Adobe After Effects! In this tutorial, we covered the process of designing a music player with cover image, text details, and interactive buttons. We also explored how to animate an audio equalizer that syncs with the music. Remember, you can always customize and experiment with different settings to make it truly unique. I hope you found this tutorial helpful, and I look forward to seeing you in my next video!