Transform effects in Adobe Illustrator and Photoshop allow you to create stunning graphic designs with simple yet powerful tools. In this tutorial, we will explore how to use the Transform, Gradient, Liquify, and Iris Blur effects to craft three amazing designs.
By the end of this tutorial, you will learn how to:
- Use Transform effects to create layered designs.
- Apply Gradient and Gaussian Blur for depth and color blending.
- Use Liquify and Iris Blur to achieve fluid, wavy textures.
- Enhance your designs with Bevel & Emboss, Shadow Effects, and Color Adjustments.
Let’s dive into the process!
Understanding Transform Effects in Adobe Illustrator
Before we start designing, let’s understand the key features of the Transform Effect in Illustrator:
What is the Transform Effect?
The Transform Effect in Illustrator allows you to duplicate and modify objects in a controlled way. You can:
- Scale, rotate, or move objects.
- Create repeating patterns and mirrored effects.
- Stack multiple shapes for a layered look.
- Apply transformations non-destructively.
Why Use Transform Effects?
- Time-saving: Automates repetitive design elements.
- Consistency: Ensures precise, uniform transformations.
- Creativity: Enables the creation of complex patterns with simple shapes.
Now, let’s apply these techniques in our first design!
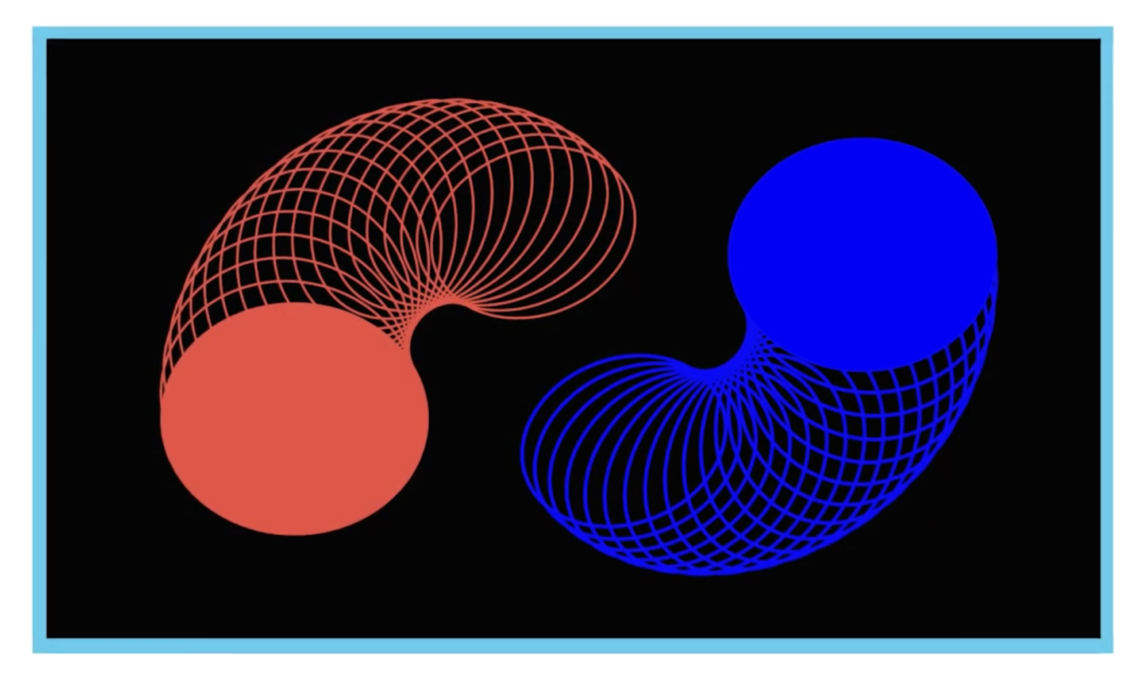
Design 1: Creating a Simple Transform Effect in Illustrator
Step 1: Setting Up the Background
- Open Adobe Illustrator and create a new document (1920×1080 pixels).
- Select the Rectangle Tool (M) and draw a background rectangle.
- Fill it with a neutral color to create contrast with the foreground elements.
Step 2: Creating the Transform Effect
- Select the Ellipse Tool (L) and draw a circle.
- Apply a white stroke and remove the fill color.
- Go to Effect > Distort & Transform > Transform to open the Transform Panel.
- Increase the number of copies to 17.
- Adjust the vertical movement to create a stacked effect.
- Add a slight angle rotation to give a dynamic look.
- Click OK and review the design.
Step 3: Duplicating and Mirroring the Effect
- Select the transformed shape and duplicate it using Ctrl + C, Ctrl + F.
- Flip the duplicate vertically using Object > Transform > Reflect.
- Change the stroke color to blue for contrast.
- Adjust positioning to achieve a mirrored effect.
Step 4: Final Adjustments
- Create an ellipse shape in the center to unify the composition.
- Apply a gradient fill to enhance depth.
- Save your design!
Design 2: Creating a Layered Transform Design in Illustrator
Step 1: Preparing the Background
- Open a new artboard in Illustrator.
- Draw a background rectangle and fill it with a light color.
Step 2: Creating the Base Shape
- Select the Ellipse Tool (L) and draw a circle.
- Apply a stroke color and remove the fill.
Step 3: Applying Warp Effects
- Go to Effect > Warp > Arc.
- Adjust the bend percentage to create a flowing shape.
- Experiment with Arc Lower, Arc Upper, and other warp options.
Step 4: Using Transform to Create Layered Effects
- Select the warped shape and go to Effect > Transform.
- Set the number of copies to 5.
- Adjust horizontal and vertical scaling to create an outward effect.
- Modify angle rotation for an organic, layered look.
Step 5: Adding Depth with Colors
- Expand the appearance using Object > Expand.
- Ungroup all elements and assign different colors to each layer.
- Adjust stroke thickness for depth variation.
- Save your design!
Design 3: Creating Wavy, Fluid Designs in Photoshop
Step 1: Creating Wavy Lines in Illustrator
- Open a new artboard in Illustrator.
- Use the Ellipse Tool (L) to draw a circle with a stroke.
- Go to Effect > Distort & Transform > Transform.
- Increase the number of copies and adjust scaling values.
- Apply rotation angles to create an organic wave effect.
- Duplicate the shape and modify the angle for variation.
- Save the file and export it to Photoshop.
Step 2: Importing to Photoshop
- Open Adobe Photoshop and create a new document (1000×1000 pixels).
- Import the Illustrator file as a smart object.
Step 3: Applying Gradient Overlay
- Double-click on the layer and select Gradient Overlay.
- Use a magenta-to-blue gradient:
- Magenta: #F600FF
- Blue: #0F00FF
- Adjust angle and scaling for a smooth blend.
Step 4: Applying Liquify for a Fluid Effect
- Go to Filter > Liquify.
- Use the Forward Warp Tool to push and pull edges.
- Adjust brush size for subtle changes.
- Click OK when satisfied.
Step 5: Adding Iris Blur for Depth
- Go to Filter > Blur Gallery > Iris Blur.
- Position the blur over central areas.
- Adjust blur strength to blend edges.
- Click OK.
Step 6: Enhancing with Bevel & Emboss
- Double-click the layer to open Layer Styles.
- Enable Bevel & Emboss and adjust:
- Depth: 50-100% for a subtle 3D effect.
- Size: 5-10 pixels.
- Light angle: Adjust for realism.
- Click OK.
Step 7: Adding a Shadow Effect
- Create a new layer.
- Use the Elliptical Marquee Tool (M) to draw a soft shadow.
- Fill with black and apply Gaussian Blur.
- Set blending mode to Multiply.
Step 8: Final Touches
- Adjust curves and levels to enhance contrast.
- Save your design!
Conclusion
In this tutorial, we explored three stunning design techniques using Illustrator and Photoshop:
- Basic Transform Effects – Creating geometric patterns using Transform.
- Layered Transform Design – Using Warp & Transform to build complex layered designs.
- Fluid Wavy Design – Applying Liquify, Gradient, and Iris Blur for organic movement.
These techniques can be used in branding, digital art, and abstract graphic design. Experiment with different settings to create unique variations!
If you enjoyed this tutorial, like, share, and subscribe for more graphic design tips!