In this guide, you will learn: ✅ How to create a match cut transition between two shapes ✅ How to apply easing and motion graphs for smooth animation ✅ How to morph complex objects like a matchstick into a sword ✅ How to animate full scene transitions with match cuts
By the end, you’ll have a pro-level transition technique in your motion design toolkit!
Step 1: Basic Shape Morph Transition
Let’s start by morphing a square into a circle using match cuts.
1. Set Up the Shapes
- Open After Effects and create a New Composition.
- Use the Shape Tool (Q) to draw a square and a circle.
- Place them in the timeline at one-second intervals.
2. Animate Position & Corners
- Select the square layer and hit
Pto open position properties. - Set a keyframe at 0s.
- Move forward one second and move the square to the circle’s position.
- Apply Easy Ease (F9) to smooth the animation.
- To round the edges:
- Add Round Corners from the shape properties.
- Animate the Radius from 0 to 200.
3. Apply the Match Cut Transition
- Instead of adding extra frames, we’ll cut directly at the fastest movement.
- Use the Pick Whip tool to parent the circle to the square.
- Trim the layers:
- Alt + Right Bracket to cut the square at its fastest movement.
- Alt + Left Bracket to trim the circle at the same point.
🎯 Result: The eye perceives a seamless morph between the square and the circle.
Step 2: Morphing a Matchstick into a Sword
Let’s take this technique further by transitioning a matchstick into a sword.
1. Create a Null Controller
- Layer > New > Null Object.
- Rename it
Master Match Cut Null. - Snap it to the matchstick anchor point using
Ctrl + Drag. - Parent the matchstick to the null.
2. Animate the Movement & Rotation
- Select the null and hit
Pfor position. - Add keyframes at 4s and 5s to move the matchstick to the sword’s position.
- Hold Shift + R to open Rotation.
- Rotate the matchstick 180°.
- Parent the sword layer to the null.
3. Finding the Match Cut Frame
- Open the Graph Editor.
- Identify the fastest point in the movement.
- Trim layers:
- Matchstick: Alt + Right Bracket.
- Sword: Alt + Left Bracket.
🎯 Result: A clean match cut transition without extra animations!
Step 3: Scene-Wide Match Cut Transition
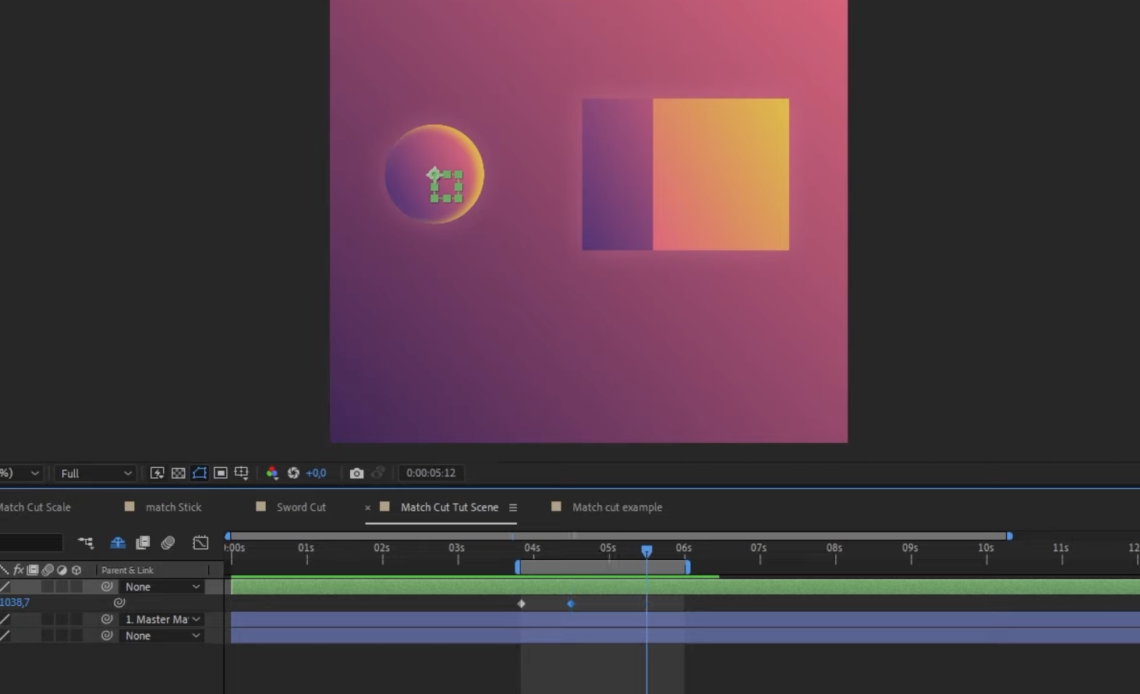
You can match cut entire scenes, not just objects. Here’s how we morph a sphere into a cube.
1. Add a New Null Object
- Layer > New > Null Object.
- Rename it
Master Match Cut Null 2. - Parent the sphere to this null.
2. Animate Position with Anticipation
- Set keyframes at
4s 12fand5s 12ffor movement. - Move the sphere into the cube’s position.
- Parent the cube to the null.
3. Add Anticipation for Realism
- Select the sphere layer.
- Add a Convert Vertex Tool (
Ctrl + Alt + Clickon the keyframe). - Drag the handles downwards to add anticipation.
4. Trim at the Fastest Motion Frame
- Identify the fastest motion point in the Graph Editor.
- Trim sphere:
Alt + Right Bracket. - Trim cube:
Alt + Left Bracket.
🎯 Result: A perfectly synchronized scene transition.
Step 4: Enhancing Match Cut Transitions
1. Add Background & Grids
- A subtle background shift makes the transition more immersive.
- Create a grid system to align elements.
2. Introduce Scene-Specific Details
- Add elements unique to each scene:
- Scene 1: Smoke, particles.
- Scene 2: Lighting, depth effects.
- These details make the transition feel more natural.
3. Experiment with Different Properties
- Scale transitions: Morph objects by animating their scale.
- Color transitions: Change the color at the cut point.
- Motion blur: Apply slight motion blur to enhance realism.
Conclusion
🎉 Congratulations! You’ve learned how to create seamless match cut transitions in After Effects.


